You have a WordPress site full of posts by admin, a persona nobody remembers creating, or a writer with a one-line bio and a stock photo. Author pages SEO is how you fix that, by making every byline point to a real, verifiable person.
This matters more now than it did a few years ago. Google’s people-first guidance asks who created your content, and AI search systems need a clear source to attribute claims to.
It is also widely misunderstood. Many site owners add an author box and some schema, then expect a ranking boost that never arrives.
This guide explains what author pages actually do, and why fake or thin bylines are a real risk. It then walks through how to audit every author on your site, step by step.
It is written for small business owners, WooCommerce store owners, marketers and in-house SEOs running WordPress sites. It works whether you publish alone or with a team of writers.
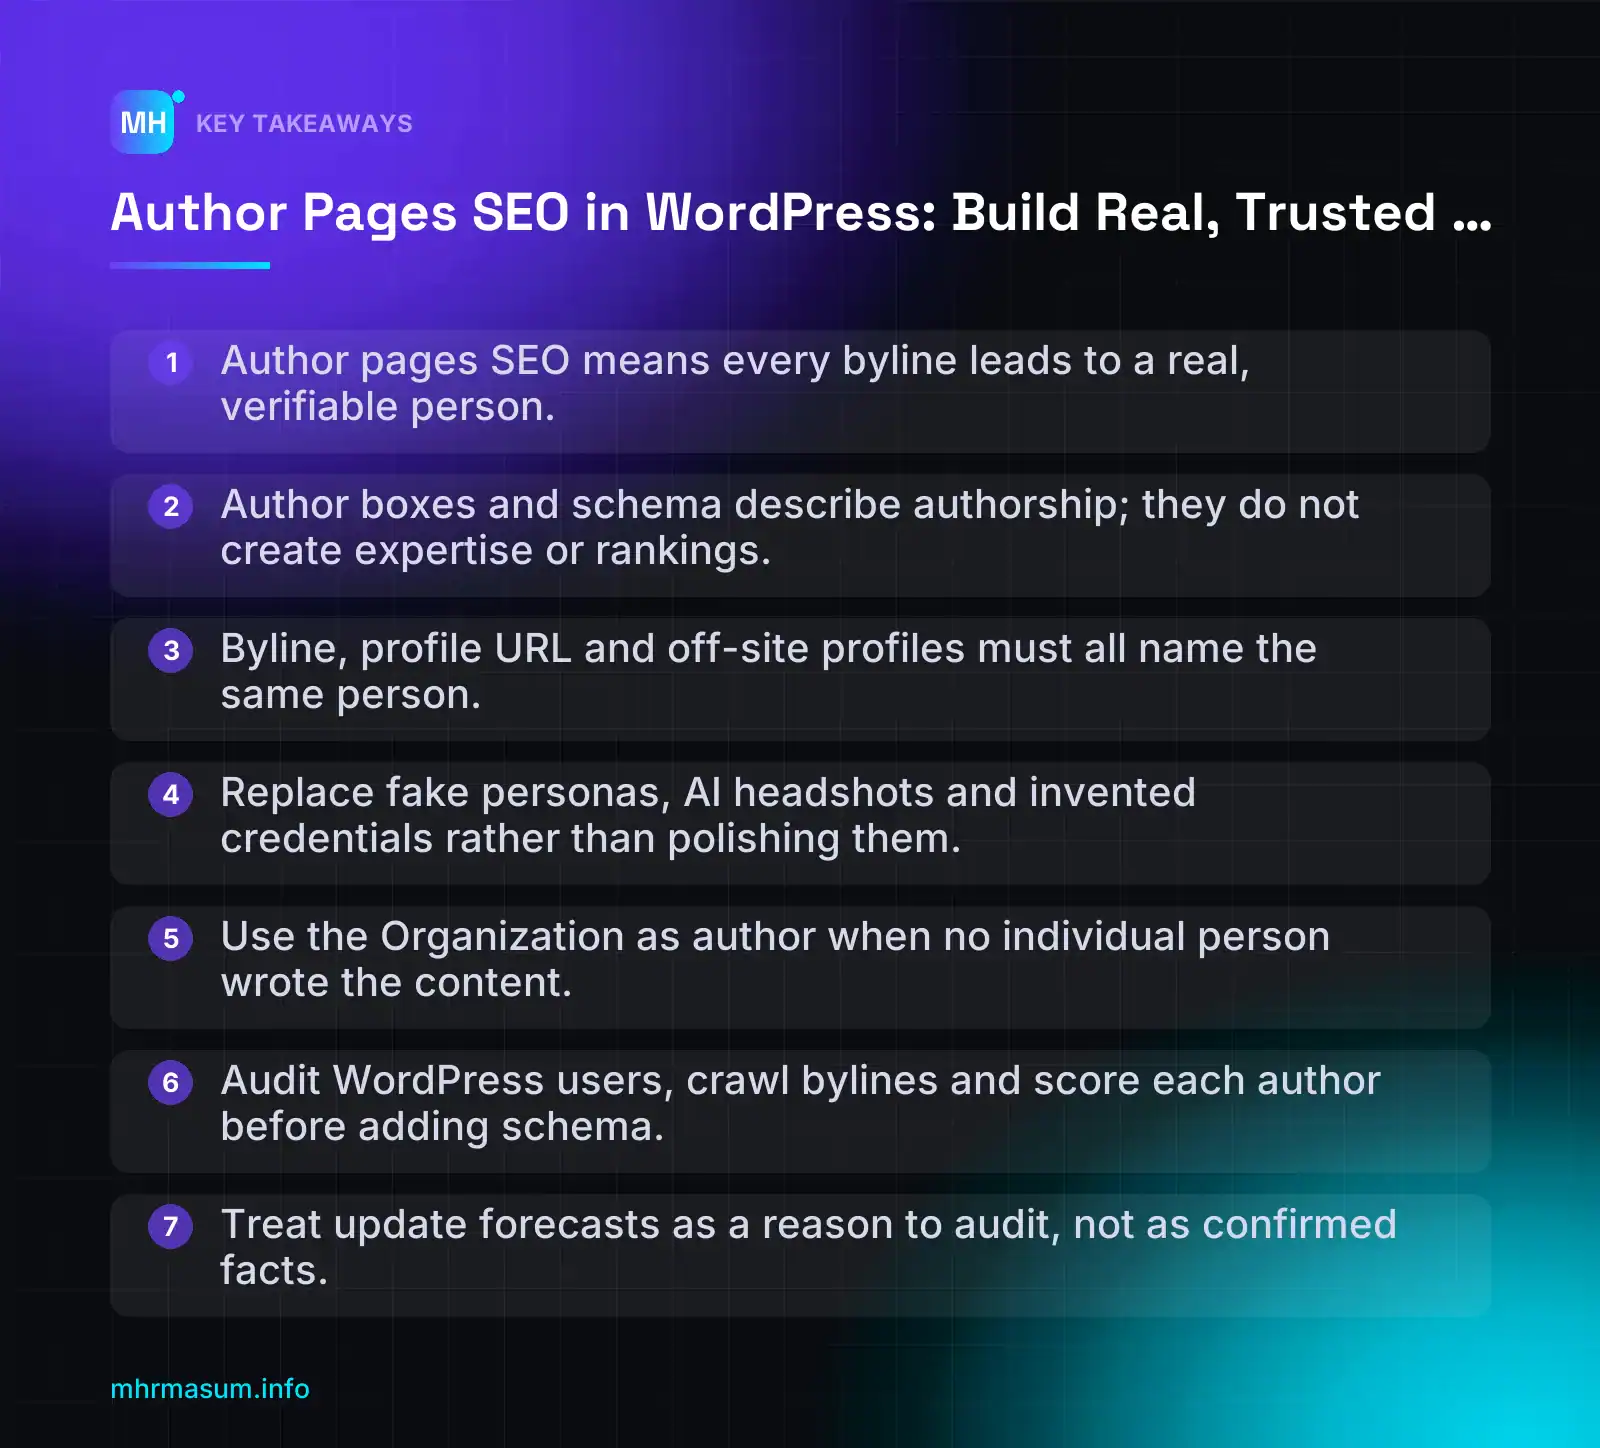
Key Takeaways
- Author pages SEO means every byline leads to a real, verifiable person.
- Author boxes and schema describe authorship; they do not create expertise or rankings.
- Byline, profile URL and off-site profiles must all name the same person.
- Replace fake personas, AI headshots and invented credentials rather than polishing them.
- Use the Organization as author when no individual person wrote the content.
- Audit WordPress users, crawl bylines and score each author before adding schema.
- Treat update forecasts as a reason to audit, not as confirmed facts.
What author pages SEO really means (and what it doesn’t)
Author pages SEO is the work of making every byline on your site point to a real, verifiable person. It is not a plugin setting or a schema trick.
Done properly, it helps readers trust your content, helps Google understand who wrote it, and gives AI search systems a clear source to attribute claims to.
Bylines, author archives and author entities
Think of authorship as three connected parts. If one is missing or fake, the rest loses its value.
| Part | What it is | Where it lives | What “good” looks like |
|---|---|---|---|
| Byline | The visible “By [Name]” on each post or guide | Top of the article, often with a date | A real name that links to that person’s profile URL |
| Author archive or profile URL | One page per author, such as /author/jane-smith/ or /about/ |
Your WordPress site | A real bio, credentials, photo, contact or social links, and a list of their work |
| Person entity | The person as Google and AI systems understand them | Your schema plus off-site profiles | Consistent name, role and links that match LinkedIn, industry sites and other mentions |
Google’s Article structured data documentation says author.url should point to a page that uniquely identifies the author, such as a bio page. Google can use both url and sameAs to tell authors apart (Google Search Central).
That is why the three parts must agree. The byline names the person, the profile URL identifies them, and off-site profiles corroborate them.
Why an author box alone does nothing
“Adding author boxes and schema boosts E-E-A-T rankings.”
This is one of the most common assumptions in WordPress SEO, and it gets the cause and effect backwards.
- Markup describes authorship. It cannot create expertise. Google says Article markup helps it understand the page and can affect how results look. It does not describe it as a ranking boost.
- No study we can point to shows author boxes are a direct ranking factor. Be wary of anyone who claims otherwise.
- Google’s people-first guidance asks you to consider Who created the content, How it was created and Why it exists (Google Search Central). Those questions are about real transparency, not decoration.
An author box with a stock photo and “Jane is a passionate content writer” answers none of those questions. A bio stating that the author has run WooCommerce stores for eight years and tested the settings described does.
Who actually benefits from proper author pages
- Readers checking whether advice on tax, health, money or product choices comes from someone qualified.
- Google, working out which person wrote the content and separating them from others with the same name.
- AI search systems such as AI Overviews, ChatGPT and Perplexity, which often name or link the source behind a claim. A clear, consistent author entity makes that attribution easier. See also Google Preferred Sources and AI Search Visibility.
Decision rule: how many author pages do you need?
- Single-author business site (consultant, local trade, small agency): the owner’s About page can be the author page. Point every byline and
author.urlto it. - Multi-author blog or WooCommerce store: create one profile URL per real person who writes or reviews content.
- Content with no individual author (store policies, generic category text): use the Organization as author rather than inventing a person.
Single author:   Byline "MD Harunur Rashid" → /about/
Multi-author:    Byline "Jane Smith"        → /author/jane-smith/
                 Byline "Rahim Uddin"       → /author/rahim-uddin/
No real person:  Author = Organization      → /about/ (company page)
Why fake and thin bylines are a risk right now
Many WordPress sites still publish under “admin”, a made-up persona, or a name with a one-line bio. That was always weak. Now it is a pattern Google’s guidance names directly.
The Panda-style update forecast: what is and isn’t confirmed
On 15 October 2026, Dan Taylor wrote in Search Engine Journal that his prediction model gave a 96.8% chance of a Google update within 30 days. He linked the risk to scaled AI content and fake authors (Search Engine Journal).
| Claim | Status |
|---|---|
| An analyst’s model forecast a high chance of an update | Reported in SEJ |
| Google has announced a Panda-style update | Not confirmed by Google |
| Google’s guidance discourages fabricated creators and scaled low-value content | Documented in official guidance |
Treat the forecast as a reason to audit, not as a fact. For confirmed updates, check the Google Search Status Dashboard. Do not react to rumours by mass-deleting content.
The good news is that cleaning up fake authors is worth doing whether an update arrives or not.
What Google’s guidance says about fabricated creators
According to an 8ms summary, Google’s people-first guidance now warns against fabricated creator profiles, including AI-generated headshots, made-up names and false credentials (8ms).
Read the exact wording on the official Creating helpful, reliable, people-first content page before you quote it in your own editorial policy. The Who/How/Why section on that page already makes the direction clear: bylines should be accurate and lead to real information about the author.
Typical fabricated signals to look for on your own site:
- Headshots generated by AI or taken from stock libraries
- Names that match no real employee, freelancer or contributor
- Credentials such as “certified nutritionist” or “licensed accountant” that nobody can verify
- Several personas whose bios are the same template with a different name
Never copy these claims into schema either. Google’s structured data guidelines say markup must represent the visible page and must not mislead, and violations can lead to a manual action (Google Search Central).
Scaled AI content and site-wide quality
Google’s spam policies define scaled content abuse as producing many pages mainly to manipulate rankings rather than help users, however they are made. Google has also said that using automation, including AI, mainly to manipulate rankings breaks those policies (Google Search Central Blog).
A fake persona attached to hundreds of mass-produced posts is a pattern to remove, not to polish. Giving “Sarah, Senior Editor” a better bio does not fix content no real person wrote or checked.
Why this can affect your good pages too:
- Google’s core ranking systems work mainly at page level but also use some site-wide signals.
- If a large share of your URLs is thin content under fake bylines, that can weigh on how the whole site is assessed.
- Your best service pages and guides may lose visibility alongside the weak posts.
This is a risk, not a guaranteed outcome. But if your Search Console data shows a sitewide drop after a confirmed update, authorship belongs on your checklist. Use the Google Spam Update Recovery audit and the core update recovery checklist to work through it.
If you want a second pair of eyes on your bylines and content quality, start with a free SEO check. The next section gives you the full audit checklist to do it yourself.
Audit checklist: find fake, generic and thin authors
Audit what you already have before you design templates or add schema. Most authorship problems are inventory problems: old accounts, placeholder names and personas that nobody remembers creating.
The audit has three steps. Work through them in order and record the results in one spreadsheet, with one row per author.
Step 1: Export every author in WordPress
Open Users > All Users in your WordPress dashboard. Use the role links above the table (Administrator, Editor, Author, Contributor) to filter the list. The Posts column shows how many posts each user owns.
Flag these accounts straight away:
- Generic display names such as “admin”, “Editor”, “Staff Writer”, “Team” or your brand name used as a person.
- Accounts that no longer belong to anyone, such as former freelancers, an old agency login or a developer’s test user.
- Personas with a human name but no matching real person in your business.
- Users with published posts but an empty Biographical Info field under their profile.
On larger sites, WP-CLI is faster than clicking through the screens:
# List every user who can publish, as CSV
wp user list --role__in=administrator,editor,author --fields=ID,user_login,display_name,user_email,roles --format=csv

# Count published posts for one author (replace 12 with the user ID)
wp post list --post_type=post --post_status=publish --author=12 --format=count
Repeat the count for any custom post types that show bylines, such as guides or case studies.
Step 2: Crawl bylines and author URLs
The WordPress user table shows who owns each post. It does not show what readers and Google actually see. For that, you need a crawl.
In Screaming Frog, set up custom extraction under Configuration > Custom > Custom Extraction. Menu names vary slightly between versions. Pull three values from every post:
Byline text   XPath: //a[@rel='author']            (Extract Text)
Author link   XPath: //a[@rel='author']/@href       (Extract Inner HTML)
Schema name   Regex: "@type":\s*"Person"[^}]*?"name":\s*"([^"]+)"
Adjust the XPath to match your theme. Some themes use a class such as .author-name instead of rel="author". SEO plugins often output author data inside an @graph with an @id reference, so check the raw JSON-LD on one post before you trust the regex.
Then sort the export and flag:
- Mismatches where the visible byline says one name and the schema says another, often because of a theme override or a guest-author plugin.
- Bylines with no link, or links that point to the homepage instead of a profile.
- Posts where the schema author is the Organization but the page shows a person, or the other way round.
Google’s structured data guidelines say markup must represent the visible content of the page (Google Search Central). A schema author who differs from the byline is a quality problem, not a cosmetic one.
Step 3: Score each author against the checklist
Mark every author against these checks. Any single “Fail” means the author needs action in the next section.
| Check | Pass | Fail signal |
|---|---|---|
| Real person | You can name them and contact them today | Nobody on the team knows who they are |
| Real photo | Their own photo, used consistently elsewhere | Stock image, AI-generated face or a default avatar |
| Verifiable role | Job title or credential that can be checked | Vague titles such as “content expert” with no detail |
| Useful bio | Roughly 100+ words on experience, focus areas and background | One line, or empty |
| sameAs links resolve | LinkedIn and other profiles load and match the person | 404s, private profiles or a different person |
| Byline links to profile | The name links to that author’s own page | No link, or a link to the homepage |
| Schema matches byline | Same name and URL in markup and on the page | Different name, or a generic Organization |
| Posts within expertise | Topics match their real background | One “author” writes on law, health and crypto |
| Author is reachable | Contact route or a real company page | No way to reach them or confirm they exist |
| No invented credentials | Every claim can be backed up | Degrees, awards or years of experience nobody can prove |
For the photo check, run each headshot through a reverse image search such as Google Lens or TinEye. Stock photos usually show up on dozens of unrelated sites. AI-generated faces often have odd earrings, warped backgrounds or mismatched teeth.
Finally, check whether author archives earn anything in search. In Search Console, go to Performance > Search results, add a Page filter and set it to URLs containing /author/. If hundreds of author URLs show no impressions and Googlebot keeps crawling them, they are probably crawl waste. The fix comes later, in the template section. For help reading this data properly, see my guide to Search Console-first SEO reporting.
Decide what to do with each author: keep, fix, merge or retire
Every author on your list now has a score. Each one needs a clear decision. The goal is not to have more authors or fewer authors, but to have honest ones.
Decision table
| Situation | Action | Notes |
|---|---|---|
| Real expert with a thin bio | Keep and fix: rewrite the bio | Add their experience, focus areas, photo and verified profiles. This is usually the quickest win. |
| Real person without relevant expertise | Fix: add a qualified reviewer, or reassign | Show “Reviewed by” only if that review really happened. Otherwise, move the post to someone who knows the topic. |
| Invented persona | Retire: reassign to the real writer or editor | 301 the old author URL to the new author’s profile. Never keep a fake person “because the posts rank”. |
| Generic “admin” or brand-as-person | Replace | Assign each post to the person who wrote or approved it. Rename or retire the admin account. |
| Team-written content | Merge: use the Organization as author, or a named editor | Google’s Article markup allows an Organization as the author (Google Search Central). A named editor is stronger when one person approves the content. |
“If we delete our fake author, we’ll lose rankings, so it’s safer to leave them.”
This is backwards. Google’s guidance on helpful content asks you to make it clear who created the content (Google Search Central). A persona that cannot be verified is a liability you are choosing to keep. If you are already recovering from a drop, my policy-by-policy spam audit shows where fake authorship fits alongside other risks.
Reassigning posts safely when you delete a user
WordPress lets you move content as part of deleting a user. Follow these steps exactly:
- Take a full backup of the database and files.
- Export a list of the user’s post URLs from your crawl. You will need it for checks later.
- Go to Users > All Users, hover over the user and click Delete.
- On the confirmation screen, choose “Attribute all content to:” and pick the real author from the dropdown.
- Never choose “Delete all content” unless you really intend to remove every post they own.
- Click Confirm Deletion.
After deletion, the old author archive (for example /author/staff-writer/) returns a 404 unless you redirect it. Add a 301 to the new author’s profile using a redirect plugin or a server rule:
# Apache (.htaccess)
Redirect 301 /author/staff-writer/ https://example.com/author/jane-smith/

# Nginx
location = /author/staff-writer/ { return 301 https://example.com/author/jane-smith/; }
Recrawl the saved URL list afterwards. Confirm that the byline, the author link and the schema all show the new name. The same redirect discipline applies on a larger scale in WordPress site migrations.
Handling staff who have left and ghostwritten posts
Former staff are not fake authors. Keep their genuine byline and profile, and add a line such as “Former contributor, wrote for us 2019–2024”. Do not reassign their work to a current employee just to make the site look fresh. That swaps a true byline for a false one.
To keep their account but remove access, open their profile and change the role to “— No role for this site —”. Then change the email address and reset the password so they cannot log in. Their posts and author archive stay in place.
If you update an old post a lot, add the new contributor as an “Updated by” or “Reviewed by” credit. Do not remove the original author.
Ghostwriting needs a clear rule: the byline belongs to the person who is accountable for the content. That person approved it, stands behind the claims and can answer questions about it. A business owner who briefs a writer, checks the facts and signs off can carry the byline honestly. A name added to text they have never read cannot.
The same rule applies to AI-assisted drafts. Google says the problem is using automation mainly to manipulate rankings, not the use of AI itself. It also suggests explaining how content was created where readers might wonder (Google Search Central Blog). Producing many pages with little added value can fall under scaled content abuse in the spam policies. Explain your process on an editorial policy page, which we build in section 9.
If you have dozens of authors and are not sure which decision fits each one, start with a free SEO check. That way you can fix the riskiest bylines first.
Build a proper author archive template in WordPress
Your author archive is usually the page your bylines link to. If it shows only a name and a list of posts, it tells readers nothing about the person.
Google’s helpful content guidance asks whether it is clear who wrote a page, and whether bylines lead to more information about the author (Google Search Central). The archive template is where you provide that information.
Every author archive should include:
- The author’s full name as the H1
- A real photo of the person, not a logo or stock image
- Their role and organisation
- The full bio, not a shortened excerpt
- Expertise areas, matched to the topics they actually write about
- Links to their profiles elsewhere (LinkedIn, professional bodies, conference pages). You will reuse these as sameAs links later.
- A contact or booking link
- A paginated list of their posts
Classic themes: author.php
WordPress looks for author-{nicename}.php, then author-{id}.php, then author.php, then falls back to archive.php. Create author.php in a child theme so that theme updates do not overwrite it.
Here is a minimal starting point. On an author archive, get_queried_object() returns the author being viewed.
<?php
/* author.php — child theme */
get_header();
$author    = get_queried_object();
$author_id = $author->ID;
?>
<main>
  <section class="author-profile">
    <h1><?php echo esc_html( $author->display_name ); ?></h1>

    <?php echo get_avatar( $author_id, 240, '', esc_attr( $author->display_name ) ); ?>

    <div class="author-bio">
      <?php echo wpautop( wp_kses_post( get_the_author_meta( 'description', $author_id ) ) ); ?>
    </div>

    <?php $linkedin = get_the_author_meta( 'linkedin', $author_id ); ?>
    <?php if ( $linkedin ) : ?>
      <a href="<?php echo esc_url( $linkedin ); ?>" rel="me">LinkedIn</a>
    <?php endif; ?>
  </section>

  <h2>Articles by <?php echo esc_html( $author->display_name ); ?></h2>
  <?php while ( have_posts() ) : the_post(); ?>
    <h3><a href="<?php the_permalink(); ?>"><?php the_title(); ?></a></h3>
  <?php endwhile; ?>
  <?php the_posts_pagination(); ?>
</main>
<?php get_footer();
The linkedin field is not part of WordPress core. You can add profile URL fields to Users > Profile in your child theme’s functions.php:
add_filter( 'user_contactmethods', function ( $methods ) {
    $methods['linkedin'] = 'LinkedIn profile URL';
    $methods['job_title'] = 'Job title';
    return $methods;
} );
Before you add these fields, check your SEO plugin. Yoast and Rank Math already add some social profile fields to user profiles. Reuse those fields rather than duplicating them, so that your template and your schema read from the same source.
Block themes: the Author template in the Site Editor
Go to Appearance > Editor > Templates. If an Author template exists, open it. If not, use Add New Template > Author. You can create one template for all authors or one for a specific author.
Build the template like this:
- Add a Heading block set to H1 for the author name. The Archive Title block can do this, but check its output. Many themes print “Author: Jane Example”, and you may want only the name.
- Add the bio, photo and links.
- Add a Query Loop block with “Inherit query from template” switched on, so it lists only this author’s posts.
- Keep the Pagination block inside the Query Loop.
There is one limitation to plan for. Core author blocks such as Avatar and Author Biography are designed around post context, so test how they behave in the profile header before you rely on them. For role, expertise areas and profile links, you will usually need a small custom block, a shortcode or a profile plugin.
Slugs, indexing and SEO plugin settings
Display names. In Users > Profile, set “Display name publicly as” to the person’s full name. Never leave it set to the login name.
Slugs. The default archive URL is /author/user_nicename/. The nicename is generated from the login name, so the URL exposes usernames to anyone, including bots trying to guess logins.
WordPress core has no field for changing the nicename, so you have two options:
- Use WP-CLI:
wp user update 7 --user_nicename=jane-example - Use a maintained plugin from wordpress.org that adds an author slug field to the profile screen.
Changing a slug changes the URL. Add a 301 from the old author URL to the new one, and update internal links. The same rules apply as for any slug change (see SEO friendly URLs in WordPress). If you are changing several authors, map every redirect first, as you would in a site migration.
/author/jsmith_admin42/ → 301 → /author/jane-example/Indexing. Both main SEO plugins can noindex or disable author archives:
- Yoast: Settings > Advanced > Author archives
- Rank Math: Titles & Meta > Authors
| Site type | Canonical author page | Author archive setting |
|---|---|---|
| Multi-author site | Author archive | Indexable, with a full profile |
| Single-author site or personal brand | About page | Noindex or disable, and 301 to the About page |
| Guest contributors with one post | Author archive with a real bio | Indexable only if the profile is complete |
The rule is simple. If author.url in your Article markup points to the archive, the archive must stay indexable. Google says author.url should point to a page that uniquely identifies the author, such as a bio page (Google Search Central).
If you disable archives, check where your plugin sends visitors. Some redirect disabled author archives to the homepage. A 301 to the About page is usually more useful.
One author = one URL. Bylines, author boxes, related-post widgets, RSS and schema should all point to the same profile. A common problem is that the theme byline links to the archive, the author box links to LinkedIn, and the schema points to the About page. Pick one canonical URL and fix every template that outputs something different.
Write an author bio that proves real expertise
A good template still fails if the bio is weak. The bio’s job is to let a reader check that this person is qualified to write about this topic. Every claim in it should be specific and, where possible, verifiable.
“Adding an author box is a ranking factor, so any bio will do.”
No published study shows that author boxes directly improve rankings. Their value is that readers can judge your credibility, and that your claims match what is visible elsewhere. A vague bio adds nothing. A false one creates risk.
What a strong bio contains
- Role and organisation. State the current job title and where they work.
- Years and type of hands-on work. Say what kind of work, not just how many years: “8 years running technical SEO audits for WooCommerce stores” rather than “8 years in digital marketing”.
- Specific topics covered. Name the subjects they write about on your site. These should match the areas you are building topic-level authority in.
- Verifiable credentials, with links. Include qualifications, memberships and talks that a reader can check on the issuing body’s site.
- What they personally test or do. For example: “Tests every plugin setting on a staging store before writing about it.”
- How to contact them. Give an email address, a contact form or a booking link.
Short bio vs full profile
You need two versions. The short bio sits under each post. The full profile lives on the canonical author page.
| Short byline bio | Full profile page | |
|---|---|---|
| Length | 1–2 sentences | 150–400 words |
| Purpose | Show relevance to this article | Prove identity and expertise |
| Links | One link to the profile | Credentials, profiles, contact |
Template example. “Jane Example” is a fictional placeholder, not a real person. Replace every detail with true, checkable facts.
SHORT BIO (under posts)
Jane Example is a WooCommerce SEO consultant at Example Agency, where she
has audited product feeds and store structures since [year].
→ Read Jane's full profile

FULL PROFILE (author page)
Jane Example — Senior WooCommerce SEO Consultant, Example Agency

Jane has [X] years of hands-on experience in technical SEO for online
stores, mainly WooCommerce sites selling in [markets].

She writes about: Google Merchant Center, product feeds, product schema
and faceted navigation.

Credentials:
- [Qualification] — [link to issuing body's verification page]
- Speaker, [real event name, year] — [link to event page]

How she works: Jane tests feed and schema changes on a staging store
and checks results in Merchant Center diagnostics before recommending them.

Contact: [email or booking link] | LinkedIn: [URL]
Bio mistakes that undermine trust
- Vague superlatives. “Leading expert” and “passionate marketer” say nothing. Replace them with what the person actually does.
- Unverifiable awards. If a reader cannot find the award online, remove it or link to proof.
- A stock or AI-generated photo. Reverse image search exposes these in seconds. Use a real photo of the person.
- The same bio copied across writers. Swapping only the name makes every author look interchangeable.
- Credentials that do not match the topic. An accounting qualification does not support articles on schema markup. Show the expertise that is relevant to what the person writes.
Treat every bio claim as something you will also put in structured data. Markup must reflect what is visible on the page and must not mislead, and structured data violations can lead to a manual action (Google Search Central).
YMYL topics. On health, finance or legal content, you can add a named expert reviewer, such as a doctor, accountant or solicitor. Do this only if that person genuinely reviews the content. Show “Reviewed by”, the date of the review, and a link to the reviewer’s own profile page with their credentials.
A reviewer label on pages the reviewer has never read is a fabricated credential. It carries the same risk as a fake author.
If you are unsure whether your current bios would pass this check, a free SEO check is a quick way to get a second opinion before you move on to schema.
Person, ProfilePage and Article author schema, step by step
Once the visible author page is solid, structured data helps Google connect the byline on each post to the person behind it. Schema describes what is already on the page. It does not create expertise that isn’t there.
“Add author schema and Google will rank us higher.”
Structured data helps Google understand a page and can affect how it appears in results. It is not a ranking shortcut, and no study shows author schema to be a direct ranking factor. Use it to make your real authors unambiguous.
Article author markup on every post
Google’s Article documentation lists no required properties. Its author best practices are still specific (Google Search Central):
- Mark up every author shown in the visible byline, each as a separate entry.
- Use
Personfor people andOrganizationfor organisations. - Put only the name in
name. No job titles, “Dr” prefixes or “Reviewed by” text. - Add
urlorsameAswith valid URLs.author.urlshould point to a page that uniquely identifies the author, such as their bio page.
Here is a post with two authors:
{
  "@context": "https://schema.org",
  "@type": "BlogPosting",
  "headline": "How to Fix Merchant Center Price Mismatches",
  "datePublished": "2026-10-20T09:00:00+06:00",
  "dateModified": "2026-10-28T14:30:00+06:00",
  "author": [
    {
      "@type": "Person",
      "@id": "https://example.com/author/jane-smith/#person",
      "name": "Jane Smith",
      "url": "https://example.com/author/jane-smith/"
    },
    {
      "@type": "Person",
      "@id": "https://example.com/author/rahim-uddin/#person",
      "name": "Rahim Uddin",
      "url": "https://example.com/author/rahim-uddin/"
    }
  ]
}
ProfilePage + Person on the author page
If author.url points to a profile page on your own site, Google recommends adding ProfilePage markup to that page (Google Search Central).
In ProfilePage, mainEntity is required. It must be a Person or Organization. Google recommends properties such as name, alternateName, description, image, sameAs and dateModified. Check the current list before you build, as it can change (Google Search Central).
{
  "@context": "https://schema.org",
  "@type": "ProfilePage",
  "dateCreated": "2024-03-11T10:00:00+06:00",
  "dateModified": "2026-10-15T12:00:00+06:00",
  "mainEntity": {
    "@type": "Person",
    "@id": "https://example.com/author/jane-smith/#person",
    "name": "Jane Smith",
    "description": "Ecommerce SEO lead specialising in WooCommerce and Google Merchant Center feeds.",
    "image": "https://example.com/wp-content/uploads/jane-smith.jpg",
    "jobTitle": "Ecommerce SEO Lead",
    "worksFor": {
      "@type": "Organization",
      "name": "Example Digital Ltd",
      "url": "https://example.com/"
    },
    "sameAs": [
      "https://www.linkedin.com/in/janesmith-example/",
      "https://example.com/about/team/"
    ]
  }
}
jobTitle and worksFor are valid schema.org properties but are not in Google’s recommended list. Include them only if the role and employer appear on the visible page.
Connecting them with @id
Give each author one stable identifier and reuse it everywhere. A simple pattern is the author page URL plus a fragment:
https://example.com/author/jane-smith/#person- The same
@idappears in the Articleauthorand the ProfilePagemainEntity. - Keep
nameandurlinline in the Article as well. Don’t rely on the @id reference alone, because Google’s documentation describes author properties on the Article itself. - Never change the @id when you redesign or rename slugs. If an author slug must change, redirect the old URL. My guide to SEO friendly URLs in WordPress explains how to handle slug changes safely.
Validating and plugin settings
Most WordPress sites already output some author schema through an SEO plugin. Check what you have before adding anything.
| Source | What it typically outputs | What to check |
|---|---|---|
| Yoast SEO | A connected schema graph where the Article references a Person node. Social URLs from the user’s profile fields are used as sameAs. |
Whether your version marks author archives as ProfilePage. Whether the Person node uses the author archive as its URL. |
| Rank Math | Author as a Person in Article schema, with profile details from the WordPress user. | The schema type on author archives. Whether the author is set to the real person rather than the site. |
| Theme or extra schema plugin | Often a second, separate Person or Article block. | Duplicate nodes with different names or URLs for the same author. |
Plugin behaviour changes between versions. Treat the live page source as the truth, not the settings screen.
- Open a post and an author page. Use View Source and search for
"Person". - Count the Person nodes for each author. You want one, referenced consistently.
- If two plugins both output author schema, disable it in one of them. Don’t leave conflicting copies.
- Run both URLs through the Rich Results Test, which shows how Google reads the page.
- Run them through the Schema Markup Validator to catch general schema.org errors.
- Compare the markup with the visible byline: same names, same order, same photo, same role.
The last step matters most. Google’s general guidelines say markup must represent the visible content and must not mislead. Structured data problems can lead to a manual action (Google Search Central). Never put credentials, awards or authors in schema that readers can’t see on the page.
If you would rather have someone check the full schema graph, our free SEO check flags duplicate and conflicting author nodes.
sameAs links and off-site corroboration
sameAs tells Google which external profiles belong to the same person. It only helps if those profiles are real, public and clearly about the same individual.
This matters most for common names. Google says it can use both sameAs and url to tell authors apart (Google Search Central). If your writer shares a name with a footballer or another marketer, these links are how you separate them.
Which profiles to link
Choose profiles that show professional identity and independent evidence, not just activity.
| Profile type | Why it helps | Watch out for |
|---|---|---|
| Shows role, employer and work history | Private or half-empty profiles. Job titles that don’t match your site. | |
| Professional body register | Independent proof of a qualification, for example an accountancy, legal or medical register | Link the public register entry, not a search results page |
| Google Scholar or ORCID | Ties the person to published research | Only relevant if they actually publish research |
| Conference speaker pages | Third-party confirmation of expertise | Event pages that are taken down after the event. Check them yearly. |
| Guest articles on reputable sites | Shows that other editors trust them with a byline | Paid placements on low-quality blogs add nothing |
| Company team page | Confirms employment | Must show the same name and role |
Leave out these:
- Dead links or profiles that return 404 or redirect to a login page.
- Private or locked accounts that Google and readers can’t see.
- Inactive social accounts with no professional content.
- Profiles of a different person with the same name. Check them carefully.
A clean sameAs array looks like this:
"sameAs": [
  "https://www.linkedin.com/in/janesmith-example/",
  "https://orcid.org/0000-0000-0000-0000",
  "https://conference-example.org/speakers/jane-smith/",
  "https://example.com/about/team/"
]
Show the same links visibly on the author page. Schema that lists profiles readers can’t find is exactly the mismatch the structured data guidelines warn against.
Keeping identity consistent across the web
Google and AI systems build a picture of a person from many sources. Inconsistent details make that picture blurry.
- Use one name format everywhere. If the byline says “Jane Smith”, don’t use “J. Smith-Ahmed” on LinkedIn without the full version somewhere.
- Use the same recent photo on the author page, LinkedIn and speaker profiles. Never use AI-generated headshots for people who exist.
- Keep role and employer aligned. Update the author page on the day someone changes jobs.
- Link back to the author page where the platform allows it. LinkedIn, ORCID, Google Scholar and most speaker bios have a website field. A two-way link is stronger than a one-way claim.
- Record every profile in a simple sheet: URL, owner, last checked date. You’ll use it in the quarterly review.
This kind of consistency also supports wider authority on a subject. My guide to topic-level authority SEO covers how author focus and topic focus work together.
“We should create a Wikidata item and a Wikipedia page for each author so Google recognises them as entities.”
Don’t do this. Wikipedia and Wikidata have their own notability and sourcing rules, and community editors remove entries that don’t meet them. Self-promotional entries can be deleted and can damage the person’s reputation.
Link to an existing Wikipedia article or Wikidata item only when the person genuinely meets those rules and the entry was created independently. For most small business authors, a strong LinkedIn profile, a team page and a few real third-party mentions are enough.
Fake corroboration is a bigger risk than none at all. If you are cleaning up after invented authors or bought bylines, work through the policy-by-policy spam audit first. If you’d like a second opinion on your author setup, you can book a free consultation.
Editorial policy page and honest AI-assisted content
Author pages answer who wrote something. An editorial policy answers how it was made and why readers should trust the process.
Google’s helpful content guidance asks you to consider Who, How and Why for your content (Google Search Central). An editorial policy page puts the “How” in one public, linkable place.
What the editorial policy should cover
Keep it short and specific. If a rule isn’t followed in practice, leave it out. A policy that describes a process you don’t run is another form of fake signal.
| Section | What to write |
|---|---|
| Who writes and reviews | Named writers and reviewers, linked to their author pages. Say who signs off on technical, medical, legal or financial claims. |
| Sourcing and fact-checking | Which sources you prefer, such as official documentation and primary data. Explain how claims, figures and screenshots are checked before publishing. |
| How AI tools are used | Which tasks AI helps with, such as outlines, first drafts, summaries or translation. List what it is never used for. Say who reviews the output. |
| Corrections | How readers report errors, how fast you respond, and whether you add a visible correction note. |
| Update cadence | How often key guides are reviewed, and what “Updated” dates mean on your site. |
| Conflicts of interest | Disclose any commercial relationship with products you write about, including your own tools or services. |
| Affiliate disclosure | Whether you earn commission from links, and how that affects recommendations. |
Link the policy from three places:
- The site footer, so it is one click from every page.
- Every author page, near the bio.
- The About page, where readers go to judge who is behind the site.
Disclosing AI assistance on posts
Google says AI or automation disclosures are useful when someone might reasonably ask “How was this created?” (Google Search Central Blog).
Readers are most likely to ask that question about reviews, how-to guides, health or money advice, and anything presented as first-hand testing. For those posts, add a short line near the byline or at the end of the article:
Drafted with AI assistance, then fact-checked and edited by MD Harunur Rashid.

Research summary prepared with AI tools. All settings and menu paths were
tested on a live WordPress site by [name] on [date].

Translated from Bengali with AI assistance and reviewed by [name].
A disclosure is not a licence. Google’s spam policies treat automation, including AI, used mainly to manipulate rankings as a violation. This includes scaled content abuse (Google Search Central). Labelling thin, mass-produced pages honestly does not make them acceptable. If you are cleaning up after that kind of publishing, work through a policy-by-policy spam audit.
A human review workflow that is real
In October 2026, Google updated its guidance on using generative AI content. The update says it is critical to fact-check and review AI content manually before publishing (Search Engine Roundtable). Read the current wording on Search Central before you quote it in your own policy.
The reason is how these tools work. Language models predict likely words. They do not look up facts. As a result, they can produce a convincing menu path that doesn’t exist, a setting from an old plugin version, or a statistic with no source.
A review process you can actually defend looks like this:
- Brief: a named expert sets the angle, the sources and the claims that must be verified.
- Draft: AI may help here. Anything it produces is treated as unverified.
- Verify: check every fact, number, quote, URL and menu path against the original source or a live test.
- Edit: the reviewer adds first-hand detail, edge cases and trade-offs, and removes generic filler.
- Sign off: record the reviewer, the date and the sources checked, for example in a custom field or your editorial tracker.
“If a real person’s name is on it, Google will treat it as expert content.”
A name only adds trust when that person actually wrote or reviewed the work. Two rules have no exceptions:
- Never put a human byline on AI output nobody has reviewed. That turns a real person’s reputation into a false claim.
- Never invent a persona to front AI content. Made-up names, generated headshots and false credentials mislead readers. They also make your author schema misleading.
Common mistakes and troubleshooting
Most author SEO problems are mismatches. The visible byline says one thing, the schema says another, or the author URL points somewhere broken.
Use this table to diagnose the most common issues:
| Symptom | Likely cause | Fix |
|---|---|---|
| Schema shows “admin” or a username as the author name | The theme or plugin outputs user_login or the nicename instead of the display name |
Set a public display name under Users > Profile > “Display name publicly as”. If the template still pulls the login, fix it or change the schema source. Avoid logins like “admin” in any case. |
| Two or more Person entities for the same author | Theme schema and an SEO plugin both output author markup, or the node IDs differ | Turn off one source. Use one consistent @id for each person across the site. |
author.url returns a 404 |
The author slug or permalink changed and the old URL was not redirected | Add a 301 redirect from the old URL to the new one. Update the schema and internal links. |
| The author page is noindexed or blocked | An SEO plugin’s “noindex author archives” setting, or a robots.txt disallow | Make the bio page indexable and crawlable, or point author.url to a dedicated indexable bio page. |
| Co-authors missing from markup | A co-author plugin shows several names, but the schema only reads post_author |
Output a separate author entry for every visible author. |
| A guest author has no profile | The guest was added as plain text in the byline | Create a short guest profile page with a bio and sameAs links, then use it as author.url. |
| Organization used as author on articles with a named writer | A plugin default sets the publisher as the author | Use Person for named writers. Keep Organization as the publisher. |
Byline and schema mismatches
Google’s structured data guidelines say markup must represent the visible content of the page and must not mislead. Problems can lead to a manual action (Google Search Central). The author named in your schema must be the author readers can see on the page.
Check what Google actually renders, not just your source code:
- In Search Console, paste the post URL into the URL Inspection bar at the top.
- Click Test live URL.
- Click View tested page, then open the HTML tab.
- Search for
"author"and compare the name,@typeandurlwith the visible byline.
Here is a common mismatch and its correction:
// Wrong: login name, no URL
"author": { "@type": "Person", "name": "admin" }

// Right: matches the visible byline
"author": {
  "@type": "Person",
  "name": "MD Harunur Rashid",
  "url": "https://example.com/author/md-harunur-rashid/"
}
Caching often hides fixes. Page caches, CDNs and some schema plugins can keep serving the old markup.
After any change, purge in this order:
- The plugin cache
- The page cache
- The CDN cache
Then run the live test again.
Author archives that are noindexed but used as author.url
Google’s Article documentation recommends that author.url point to a page that uniquely identifies the author, such as a bio page (Google Search Central).
Many SEO plugins offer a setting that noindexes author archives, and some single-author sites switch it on. If that archive is also your author.url, you are pointing Google at a page you have asked it not to index.
Choose one approach:
- Option A: make the author archive indexable and turn it into a proper bio page, as set out earlier in this guide.
- Option B: keep the archive noindexed, but point
author.urlto a dedicated, indexable page such as/about/md-harunur-rashid/.
If you change author slugs, follow the redirect rules in SEO friendly URLs in WordPress. For changes across a whole site, see the site migration checklist.
Guest posts, multiple authors and brand bylines
Google advises marking up every visible author as a separate entry, with a type and a valid url or sameAs.
Do not combine two people into one name string like “Jane Smith and Ali Khan”.
"author": [
  { "@type": "Person", "name": "Jane Smith",
    "url": "https://example.com/author/jane-smith/" },
  { "@type": "Person", "name": "Ali Khan",
    "url": "https://example.com/contributors/ali-khan/" }
]
Every guest author needs a profile page, even a short one.
A good guest profile includes:
- Their real name
- A bio that is true
- A photo, if they agree to it
- Links to their own site or professional profiles
Use an Organization as the author only when no individual wrote the content. Examples include store policies, team announcements and product documentation.
If you want a second pair of eyes on your author markup and indexing, start with a free SEO check.
Maintain your authors: a quarterly review routine
Author pages decay without anyone noticing. People change jobs, social profiles get deleted, contributors leave, and new writers get added in a hurry with a one-line bio.
A short quarterly review keeps your bylines accurate and stops the problems from your first audit coming back. Put it in the calendar and assign an owner, usually the editor or the in-house SEO.
“We fixed our author pages last year, so that’s done.”
It isn’t. Authors, links and processes change. An author page that was accurate in January can be misleading by October if the person left, their credentials changed, or your AI workflow changed and the disclosure didn’t.
Quarterly author checklist
Run these steps in order. Most small sites can finish them in an hour or two.
- Re-run the crawl extraction. Use the same crawler setup from your original audit. Extract the visible byline, the author URL, and the
authorvalues from your Article JSON-LD for every post. Flag any post where the visible byline and the schema author don’t match, or where the author URL is missing. - Check that every sameAs link still resolves. Open each link or run it through a status-code checker. A link should return a working page that clearly belongs to that person. Remove links that 404, redirect to a login screen, or now point to someone else.
- Update bios and dateModified. Add new roles, qualifications or published work. Remove anything no longer true. Only change
dateModifiedin your ProfilePage markup when the content actually changed. Bumping the date without edits is a false freshness signal. - Review new authors against the audit checklist. Every author added since the last review gets the same tests: real person, real photo, verifiable experience, a bio that explains why they can write on their topics, and correct schema.
- Handle departed authors. Keep their page if their articles stay live, and update the bio to past tense (for example, “wrote for us from 2022 to 2025”). If their content is merged or removed, redirect the author URL to the most relevant page.
- Confirm your AI disclosure and editorial policy match reality. Ask the people who produce content how drafts are created, who fact-checks them and who signs off. If the answers differ from the published policy, fix the process or fix the policy. Google’s guidance on generative AI content stresses reviewing and fact-checking AI-assisted content before publishing, so the policy should describe that step only if it actually happens.
- Validate a sample of pages. Test a few author pages and articles in the Rich Results Test or the Schema Markup Validator, especially after plugin or theme updates.
Keep a simple log so the next review starts from facts, not memory:
Quarter: Q4 2026
Reviewer: [name]
Authors live: 6 | New: 1 | Retired: 1 (redirected to /about/)
Byline/schema mismatches found: 3 posts (fixed)
Broken sameAs links: 1 (removed)
Bios updated: 2 (dateModified changed on those 2 only)
Editorial policy changes: added named fact-checker for pricing claims
Next review: first week of February 2027
What to monitor in Search Console
Search Console won’t tell you whether Google “trusts” an author. It will show you visibility, markup problems and penalties, which is enough to catch most issues early.
| What to check | Where | What to look for |
|---|---|---|
| Author page impressions and clicks | Performance → Search results → Add filter → Page → URL contains /author/ |
Compare the last 3 months with the previous 3. Author pages getting impressions for people’s names is a healthy sign. Sudden drops are worth investigating. |
| Structured data issues | Enhancements section (for example, a Profile page report, where available) | New errors after plugin, theme or template changes. Reports shown vary by site and change over time, so use the testing tools as a backup. |
| Penalties | Security & Manual actions → Manual actions | Any manual action, including structured data issues. This should say “No issues detected”. |
| Indexing of author URLs | URL Inspection on each author page | Author pages you want found should be indexed and canonical to themselves. |
For cleaner trend reporting, follow the approach in Search Console-first SEO reporting rather than relying on third-party rank checks.
Watch update windows, but judge over weeks
Analyst forecasts of a coming update are a reason to tidy up, not a reason to panic. Only treat an update as real once it appears on the Google Search Status Dashboard.
When an update is confirmed, note the start and end dates in your log. Wait until it finishes, then compare site-wide performance over several weeks. Daily swings during a rollout are noise.
If you do see a sustained drop, work through the core update recovery checklist or, for spam updates, the policy-by-policy spam audit. Author fixes are one part of recovery, not all of it.
The decision rule to keep
Every review comes back to one question for each page: can you show that a real, named person is accountable for this content?
- If yes, make sure the byline, bio and schema all say the same true thing.
- If you can, but the byline is wrong, fix the byline.
- If you can’t, and nobody will take responsibility for it, remove or noindex the page.
If you’d like a second pair of eyes on your bylines, schema and editorial process, start with a free SEO check or book a free consultation.
Frequently Asked Questions
Are author pages a Google ranking factor?
Google has not said that author pages or author markup are a direct ranking factor. They help Google and readers understand who wrote the content. The value comes from real expertise and transparency, which the author page simply makes visible.
Should I noindex author archives in WordPress?
It depends on your site. On a single-author site, the author archive usually duplicates the blog page, so many owners noindex it or point bylines to the About page instead. On multi-author sites, a well-built profile with a real bio is worth keeping indexed. Check in Search Console whether those URLs earn impressions before you decide.
Can I use an AI-generated or stock photo for an author?
Avoid it. Google's people-first guidance discourages fabricated creator profiles, and a stock or AI face undermines reader trust when someone checks it. Use a real photo of the actual person, ideally the same one used on their LinkedIn or other profiles.
What schema should I use for authors in WordPress?
On each article, use Article or BlogPosting markup with an author property set to a Person, including a name and a url pointing to their profile page. You can add sameAs links to their real external profiles. Google also documents ProfilePage markup for pages about a person. Whatever you add must match what is visible on the page.
Is it acceptable to list my company as the author?
Yes, when no individual person wrote the content, such as store policies or generic category text. Set the author to your Organization and link it to your company About page. That is far better than inventing a person to fill the byline.
How do I change the admin byline on old WordPress posts?
Create or update a user account for the real author with their full name as the display name. Then reassign the posts, either by bulk editing them in the Posts screen or by choosing that user when you delete the old admin account. Check that the byline, author link and schema all update afterwards.
Do I need separate author pages for a one-person business site?
No. If you write everything yourself, a detailed About page can act as your author page. Make sure every byline and your schema author url point to it, and that it covers your real experience, role and contact details.
Final Thoughts
Start with the audit. Export your WordPress users, crawl your bylines and score every author against the checklist before you touch templates or schema.
Remove or replace anything fabricated, including personas, stock headshots and unverifiable credentials. Then make sure each real author has one clear profile URL that matches their byline, their markup and their off-site profiles.
This work is worth doing whether or not a Google update arrives. Real, consistent authorship helps readers trust you, helps Google tell your authors apart, and gives AI search systems a clear source to cite.
If you want a second opinion on your bylines and content quality, request a free SEO check and we will review it with you.
Want help applying this to your site? Run the free SEO check or book a free consultation with MD Harunur Rashid. Free SEO check · Book a free consultation