Most WordPress sites run code they did not write, from domains they do not control. A third-party script audit WordPress owners can repeat on a schedule is the simplest way to find out what that code is, who owns it and whether you still need it.
The DebugBear DNS hijack in October 2026 showed why this matters. A trusted monitoring script turned malicious without any change on the affected site. No plugin updated, no file changed and no admin logged in.
Every analytics tag, ad pixel, chat widget and payment SDK runs with the same power as your own theme code. On a WooCommerce store, that includes access to checkout fields and logged-in sessions.
The same scripts also slow your pages down and can trigger security warnings in Google Search. One audit answers all three questions: security, speed and SEO.
This guide walks you through building a script inventory from the browser, deciding what stays and what goes, reducing the risk and speed cost of what remains, and responding if something goes wrong.
It is written for small business owners, WooCommerce store owners, marketers and in-house SEOs. You don’t need to be a developer, but you will use Chrome DevTools.
Key Takeaways
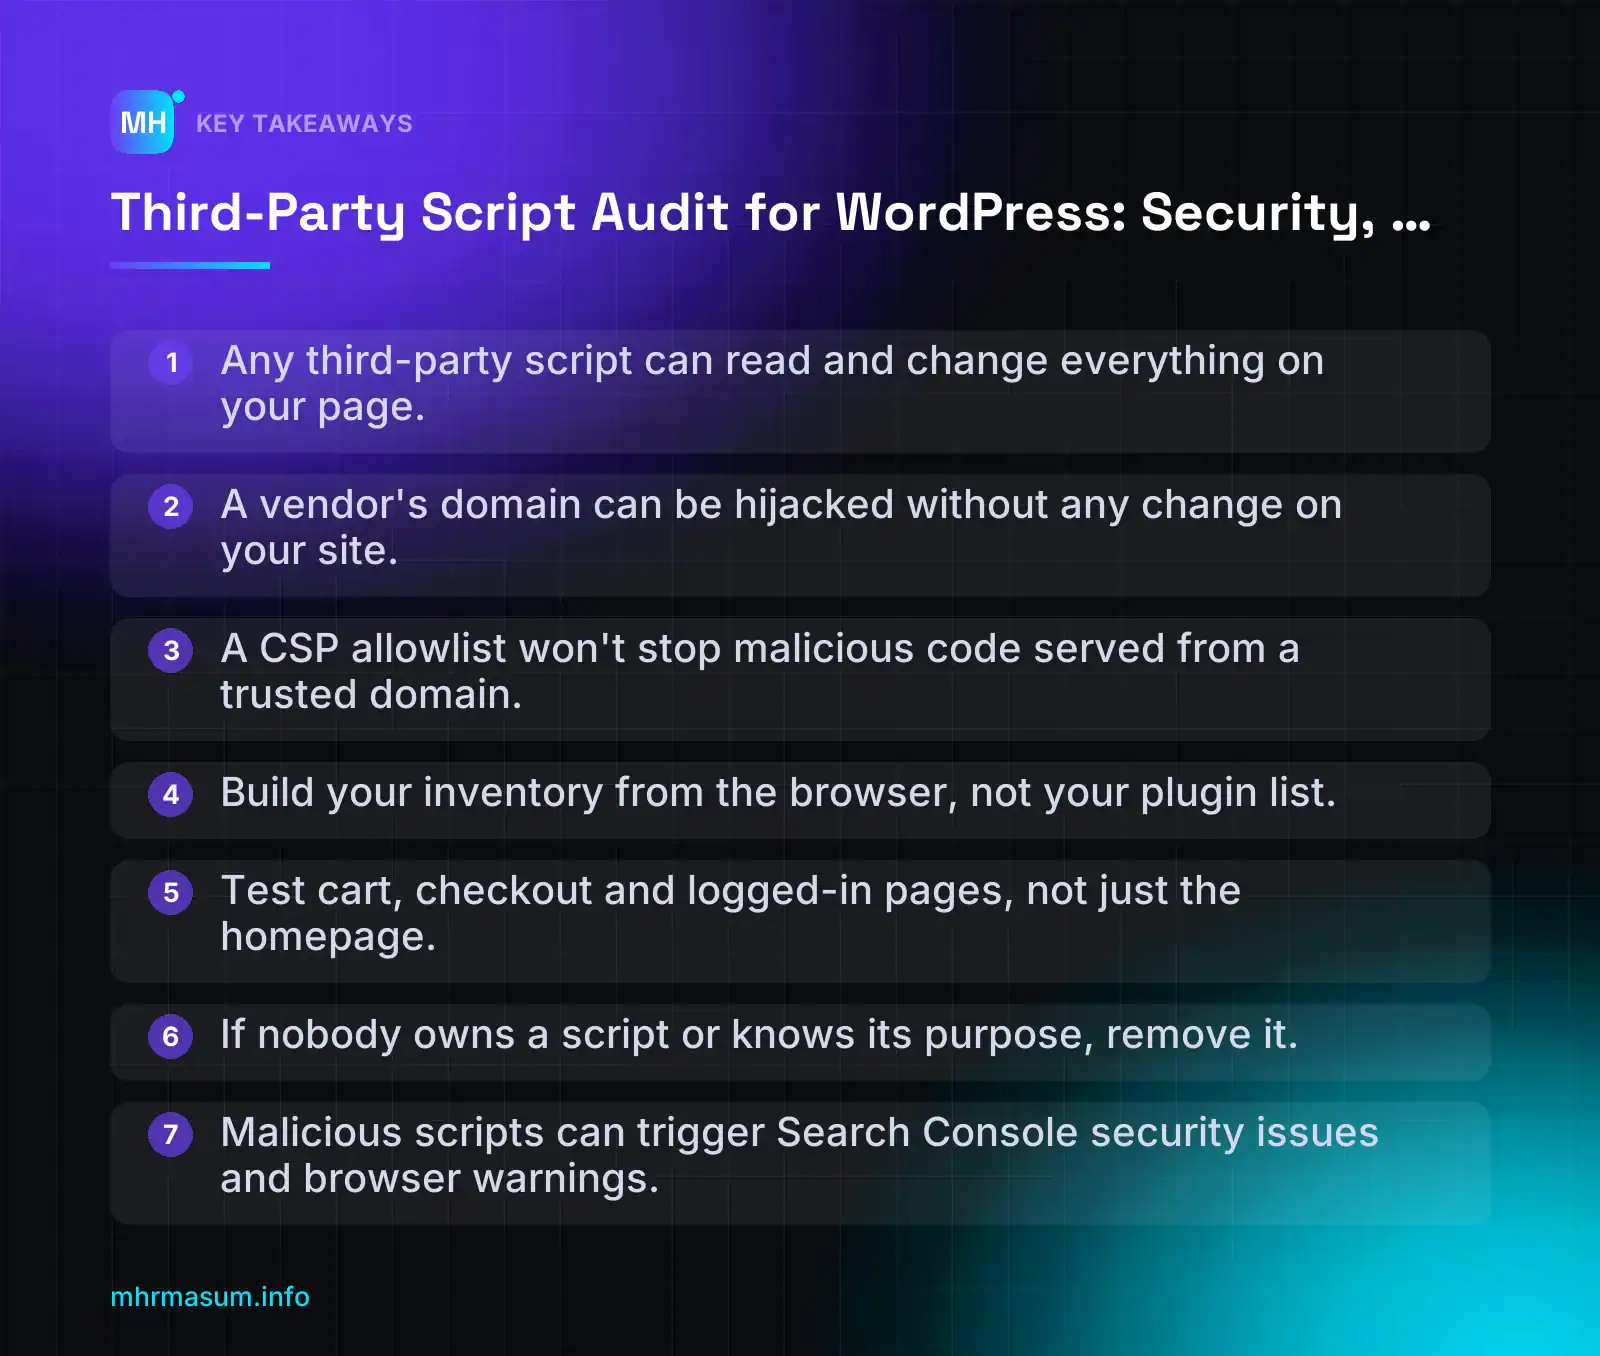
- Any third-party script can read and change everything on your page.
- A vendor's domain can be hijacked without any change on your site.
- A CSP allowlist won't stop malicious code served from a trusted domain.
- Build your inventory from the browser, not your plugin list.
- Test cart, checkout and logged-in pages, not just the homepage.
- If nobody owns a script or knows its purpose, remove it.
- Malicious scripts can trigger Search Console security issues and browser warnings.
What the DebugBear DNS hijack teaches WordPress site owners
Most WordPress sites load code from domains they do not control. The DebugBear incident shows that a trusted, well-known vendor script can turn hostile without any change on your own site.
That is the reason this audit exists. Below is what is publicly known so far, and why it matters for any WordPress or WooCommerce site.
What happened, in order
This timeline uses only what has been reported. Some details are still being investigated, so check the sources for updates.
- 29 October 2026: malicious JavaScript was found at a DebugBear real-user monitoring (RUM) script URL used by Polymarket, based on an analysis by Hudson Rock (Search Engine Journal).
- Cause: DebugBear said attackers compromised its DNS records through its domain registrar (Search Engine Journal).
- Customer action: DebugBear told customers to remove the RUM embed from their sites.
- Scope: DebugBear’s early findings say a single customer was targeted, and the script went after logged-in traders. Polymarket is returning $3.9 million to traders (SecurityWeek).
- Open question: SEJ notes it is not yet clear whether other customers received malicious code.
Other reports give different loss figures. The $3.9 million refund is the figure to rely on, not the various estimates of total losses.
How the attack worked, in plain terms
The script tag on the affected site never changed (Reflectiz). The domain it pointed to began resolving to a server the attackers controlled, and that server sent a malicious file.
Normal:     your page → <script src="https://rum.vendor-example.com/rum.js">
            DNS → vendor's server → genuine rum.js

Hijacked:   your page → same tag, same URL, nothing changed
            DNS (altered at registrar) → attacker's server → malicious rum.js
From the site owner’s side, nothing looked different. No file changed in WordPress, no plugin updated, no admin logged in.
This also explains why a Content Security Policy allowlist was not enough. The malicious file came from a domain the CSP already trusted, so the browser loaded it (Relevant Audience).
Why a ‘harmless’ performance tag is a real risk
“It’s only a monitoring script, it can’t hurt us.”
This is the most common assumption, and it is wrong. A script tag has no category attached to it. The browser runs whatever code arrives, with the same power as your own theme and plugin code.
A third-party script on your page can:
- Read and change anything on the page, including form fields as users type.
- Read cookies that are not marked HttpOnly.
- Capture WooCommerce checkout fields: names, addresses, phone numbers and, on pages that collect card details directly, payment data.
- Act inside a logged-in session: send requests as the user, change what they see, or show fake prompts.
- Load more scripts from anywhere, which your inventory will never show unless you look at the live page.
A RUM tool, a chat widget and an ad pixel all carry this same risk. What the vendor says the script does doesn’t limit what the code is able to do.
Why this is an SEO problem too
When a script injects malware, redirects or deceptive content, Google can detect it. That can lead to:
- Entries in the Security issues report in Search Console (Security & Manual Actions > Security issues) (Google Search Console Help).
- Browser warnings for visitors, based on Google Safe Browsing (Google Search Console Help).
- Warning labels next to your results in Google Search.
Clicks fall, checkout trust collapses and the clean-up takes time. A security warning also changes what people see when they search your brand. The brand SERP audit guide explains how to monitor that.
What a third-party script audit covers (and what it doesn’t)
A third-party script audit is a complete list of every script, pixel and iframe your site loads from a domain you don’t control, with an owner, a purpose and a risk assessment for each one.
Copies of vendor code that you host yourself are also in scope. Moving a file to your own server changes who serves it. It does not change who wrote it or what it does.
Security, speed and SEO in one review
Teams usually look at these three areas separately. Security checks the checkout, the developer checks PageSpeed Insights and marketing adds pixels. The same script list answers all three questions, so audit it once.
- Security: what each script can reach, who controls its domain and account, and how fast you could remove it.
- Speed: how much main-thread time and network weight each script adds, and whether it blocks rendering.
- SEO: whether a script could cause security issues, damage Core Web Vitals or break tracking you use for reporting.
The audit produces three outputs:
| Output | What it records | Who uses it |
|---|---|---|
| Script inventory | Every script, pixel and iframe: domain, file URL, pages it loads on, how it is injected (theme, plugin, tag manager), business owner, purpose | Everyone. This is the master list. |
| Access and exposure register | Who has logins for each vendor account and tag manager, whether 2FA is on, what data the script can reach (checkout, account pages, forms) | Site owner, security, IT |
| Speed impact log | Main-thread blocking time, transfer size and before/after measurements, with the tool version noted | Developer, SEO |
One inventory entry might look like this:
Script:        rum.js
Domain:        rum.vendor-example.com
Category:      RUM / Core Web Vitals monitoring
Injected by:   Google Tag Manager (container GTM-XXXX, tag "RUM - all pages")
Loads on:      All pages, including /checkout/ and /my-account/
Owner:         Marketing lead
Purpose:       Field CWV data for developer reports
Still needed?: Review. Search Console CWV report covers the main need
Exposure:      Runs on checkout. No SRI possible (vendor updates file in place)
Scope: what counts as third-party
Lighthouse treats any script served from a different domain as third-party (Chrome for Developers). That is a good starting point, but for security you need a wider definition.
Include these as well:
- Vendor code on a subdomain of your site. If
metrics.yoursite.comis a CNAME pointing at a vendor, it looks first-party but the vendor controls what it serves. - Self-hosted vendor files, such as a downloaded library or a script a plugin bundles from a vendor.
- Scripts loaded by other scripts. A tag manager or chat widget often pulls in further domains.
- Iframes and image pixels, not only
<script>tags.
Typical categories on a WordPress or WooCommerce site:
| Category | Examples | Main concern |
|---|---|---|
| Analytics | GA4 (gtag.js) | Runs on every page; data accuracy |
| RUM / CWV monitoring | Real-user monitoring snippets | Every page, including checkout |
| Tag managers | Google Tag Manager | Anyone with publish access can add code |
| Ad and social pixels | Meta, TikTok, Pinterest, Google Ads | Often duplicated; main-thread cost |
| Consent platforms | Cookie banners / CMPs | Load early; can block rendering |
| Chat widgets | Live chat, support bubbles | Heavy; load further domains |
| A/B testing | Client-side experiment tools | Often render-blocking by design |
| Heatmaps / session replay | Recording tools | Can capture form input |
| Payment SDKs | Gateway scripts on checkout | Highest-value target; can’t be removed easily |
| Reviews widgets | Product review and rating embeds | Layout shift; extra requests |
| Fonts and CDN libraries | Hosted fonts, jQuery or icon CDNs | Often easy to self-host |
If you clean up analytics tags during the audit, check your GA4 channel reports afterwards. Removing or moving tags can cause attribution gaps, which the GA4 unassigned traffic guide covers.
What this audit does not cover
This is not a malware clean-up or a server hardening project. It doesn’t cover infected core files, rogue admin users, database injections or hosting configuration.
If you already have a Security issues entry in Search Console, a browser warning or reports from customers, go straight to the incident checklist later in this article. After the clean-up, the policy-by-policy site audit can help you check that nothing deceptive is left behind.
The decision rule
If nobody can name the owner and the purpose of a script, it goes on the removal list.
Ask around once. If no one claims it within a set time, such as one week, block it on a staging copy, check that nothing breaks and then remove it. Unclaimed scripts add risk and slow the site down, and they give you nothing in return.
If you would like a second opinion on what your site loads, start with the free SEO check.
Step 1: Build the script inventory from the browser
Start with what the browser actually loads, not what you think is installed. The browser is the only place that shows the full chain, including scripts pulled in by other scripts, tag managers and CDN features you may have forgotten.
Lighthouse treats any script served from a different domain as third-party (Chrome for Developers). Use the same rule here. If the domain is not yours, it goes on the list, even if it is “only” a font, a CDN copy of jQuery or a monitoring tool.
Chrome DevTools Network panel
- Open an Incognito window so browser extensions don’t add noise. Then open DevTools (F12, or Cmd+Option+I on Mac).
- Go to the Network panel and tick Disable cache.
- Click the JS filter. Some recent Chrome versions also have a third-party requests filter. Use it if you see it.
- Reload the page. Then scroll, open menus and wait 10–15 seconds, because many tags load late or only after user interaction.
- Right-click any column header and turn on Domain and Initiator. Sort by Domain.
- Export a HAR file using the download icon in the Network toolbar. Name it by page and date, for example
checkout-consent-accepted-2026-11-03.har.
Treat HAR files as sensitive. They can contain cookies and session data. If Chrome offers a sanitised export, use it. Don’t send full HARs to vendors or post them in public tickets.
The Initiator column shows what requested each file. This is how you find chains. Examples: Google Tag Manager loading a pixel, which then loads a second vendor’s script, or a chat widget pulling in its own analytics. Hover over the initiator to see the full call stack. Record the top-level loader as well as the final script.
Sources panel and Coverage
- Sources > Page groups every loaded file by origin. It gives you a fast cross-check that you haven’t missed a domain.
- Coverage (Command Menu: Ctrl+Shift+P, then type “Coverage”) shows how much of each script is actually used on the page. A large vendor file with a very high unused percentage on most templates is a strong candidate for Step 5.
- Look for inline scripts in the Elements panel too. Snippets such as
!function(f,b,e,v,n,t,s)or(function(w,d,s,l,i)are loaders that create external requests.
Test logged-out, logged-in, cart and checkout pages
One homepage test is not an audit. WooCommerce stores often load different tags on cart and checkout, such as payment SDKs, fraud tools, conversion pixels and address autocomplete. Those are exactly the pages attackers care about.
Run the Network test on each of these:
- Home page
- A blog post
- A product page (simple and variable product if you have both)
- Cart
- Checkout
- My Account, logged in as a test customer
Test while logged out and while logged in as a customer role, not an admin. Many plugins skip tracking for administrators, so an admin session can hide scripts your customers do get. This matters: the DebugBear payload reportedly went after logged-in traders (SecurityWeek).
Repeat each template twice: once with consent accepted and once with consent rejected. Clear cookies between runs. Your consent banner’s rules change what loads, and a tag firing after rejection is a privacy problem on top of a security one. If your analytics numbers look odd afterwards, the GA4 unassigned traffic audit covers consent-related tracking gaps.
Inventory table template
| Script / domain | Vendor | Purpose | Loaded via | Pages | Owner | Account holder | Last reviewed | Keep / Remove |
|---|---|---|---|---|---|---|---|---|
Owner is the person who decides whether the script stays. Account holder is whoever controls the vendor login. These are often different people, and that gap is where forgotten scripts come from.
Example row:
Script/domain:   cdn.example-chat.com/widget.js
Vendor:          Example Chat Ltd
Purpose:         Live chat on product pages
Loaded via:      GTM tag "Chat - All Pages" (Custom HTML)
Pages:           All, incl. cart and checkout (consent rejected too)
Owner:           Sales manager
Account holder:  Former agency (login unknown)
Last reviewed:   Never
Keep/Remove:     Review - restrict to product pages, recover account access
Step 2: Find where each script is injected in WordPress
The browser tells you what loads. Now you need to know where it comes from, because you can’t remove or harden a script you can’t find. Search Engine Journal’s advice after the DebugBear incident was to check templates, plugins and tag managers, then clear cached pages (Search Engine Journal). The same script is often injected in two places, so keep looking after the first match.
Theme files and theme options
- Check
header.php,footer.phpandfunctions.phpin both the parent and child theme. - In
functions.php, look forwp_enqueue_scriptcalls with external URLs and for functions hooked towp_headorwp_footerthat echo<script>tags. - Open the theme options panel. Many premium themes have “Header scripts”, “Footer code” or “Custom JS” fields.
- Block themes: check template parts and patterns in the Site Editor for Custom HTML blocks.
Plugins (including WooCommerce marketing extensions)
Go through the settings screen of every plugin that might add a tag. Common sources:
- Site Kit by Google (Analytics, Tag Manager, AdSense)
- WooCommerce marketing and pixel integrations, such as Google, Meta, Pinterest or TikTok extensions
- Chat, review, popup and email-capture plugins
- SEO plugins with analytics or verification fields. Verification meta tags are low risk, but note who added them. The Bing Webmaster Tools setup guide shows the cleaner verification methods.
- Monitoring, A/B testing and heatmap plugins
Also check deactivated plugins that left settings behind. Code from a deactivated plugin doesn’t run, but the settings may still hold an account ID you’ll want to revoke later.
Header/footer injector plugins and Customizer fields
Tools such as WPCode, or other “Insert Headers and Footers” style plugins, are the most common home for forgotten tags. For each one:
- List every snippet, active and inactive.
- Record its location (header, footer, body), its conditions (page rules, user role, device) and who created it.
- Check Appearance > Customize for any additional script fields your theme adds.
Google Tag Manager containers
- Tags: open every tag. Pay closest attention to Custom HTML tags, because they can load anything from anywhere.
- Triggers: note which tags fire on all pages, including checkout.
- Versions: review the history. A tag nobody has touched in years, created by an unknown user, needs an owner or removal.
- Admin > User Management: check both account and container level. Remove ex-staff and old agencies.
Confirm which container ID is live on the site. Sites often carry an old container from a previous agency alongside the current one.
“We only use GTM, so everything is in one place.”
Rarely true. GTM is usually one route among several. A plugin, the theme and the CDN can all add scripts that never appear in the container.
Database and hard-coded snippets
Scripts can sit in widgets, post content, page builder data or option values. Back up the database first. Searching is read-only, but you will probably edit something soon after.
# Back up before you touch anything
wp db export backup-before-script-audit.sql

# Find script tags in options and post meta (adjust the table prefix)
wp db search '<script' wp_options wp_postmeta wp_posts

# Find a specific vendor domain anywhere in WordPress tables
wp db search 'debugbear' --all-tables-with-prefix
Then search the theme and must-use plugin folders for external domains:
grep -rhoE "https?://[a-zA-Z0-9.-]+\.[a-z]{2,}" \
  wp-content/themes wp-content/mu-plugins \
  --include=*.php --include=*.js --include=*.html \
  | sort | uniq -c | sort -rn
Compare the domains with your Step 1 inventory. Anything in the code but not in the browser may be conditional. Anything in the browser but not in the code is coming from somewhere else.
Other routes in
- Cloudflare Workers and Zaraz: these can inject or load tools at the edge without touching WordPress.
- CDN edge injection: some CDNs and proxies can insert scripts into responses.
- Hosting panel features: some hosts offer analytics or script injection options in their dashboard.
- Cache and optimisation plugins: their “delay JS” or “exclude” lists show which scripts someone knew about. They can also keep serving cached HTML that still contains a removed tag.
Injection point mapping table
| Injection point | Where to check | Who usually has access | Risk |
|---|---|---|---|
| Theme files | header.php, footer.php, functions.php (parent and child) | Developer, host (SFTP) | Medium: hidden, survives plugin changes |
| Theme options | Theme settings “header/footer scripts” | Any admin | Medium: easily forgotten |
| Plugins | Each plugin’s settings screen | Admins, marketing team | Medium: often loads site-wide |
| Injector plugins | Snippet list and conditions | Admins, agencies | High: arbitrary code, little review |
| GTM | Tags, Triggers, Versions, User Management | Marketing, agencies, ex-staff | High: Custom HTML, wide access |
| Database / content | wp_options, wp_posts, wp_postmeta | Editors, admins | Medium: hard to spot |
| CDN / edge | Cloudflare Workers, Zaraz, CDN rules | Developer, IT, host | High: invisible from WordPress |
When you finish, every row in your Step 1 inventory should have a confirmed “Loaded via” value. If some still say “unknown”, that is your first priority. If you want a second pair of eyes on the mapping, you can book a free consultation.
Step 3: Check DNS, account and access exposure
The DebugBear incident was not caused by a bad plugin or a weak WordPress password. According to DebugBear, attackers changed its DNS records through its domain registrar, so the same script URL started serving a different file (Search Engine Journal).
Be clear about the limit here. You cannot secure a vendor’s DNS. What you can do is secure your own domain and accounts, and reduce what a compromised vendor, ex-employee or old agency login can reach.
Your own domain and registrar
Your registrar account controls where your whole site, email and every subdomain point. If someone takes it over, they don’t need to touch WordPress at all.
- Turn on two-factor authentication at the registrar. Use an authenticator app or security key rather than SMS where the registrar supports it.
- Check the registrar lock. Look for a “transfer lock” or “domain lock” setting. In a WHOIS/RDAP lookup it usually shows as
clientTransferProhibited. - Enable DNSSEC if your registrar and DNS host support it. DNSSEC helps stop forged DNS answers. It does not protect you if an attacker logs into your registrar and edits the records, so it is an addition to 2FA, not a replacement.
- Update contact emails. Recovery emails often point to a former employee or a mailbox nobody reads. Renewal and security alerts must reach someone who will act.
- Export your DNS zone and review every record. Pay most attention to CNAME records.
Forgotten CNAMEs are a real risk. If status.example.com or help.example.com still points to a vendor you cancelled, someone may be able to claim that name on the vendor’s platform and serve content on your subdomain. This is called subdomain takeover.
Record review example

Host                  Type    Points to                  Still used?   Action
www                   CNAME   example.com                Yes           Keep
status                CNAME   oldvendor-status.io        No (2024)     Delete
cdn                   CNAME   abc123.cdnprovider.net     Yes           Keep, note owner
rum                   CNAME   rum.monitoringvendor.com   Unsure        Confirm, then delete
If you have changed hosts or domains in the past, old records are common. My guide to site migration SEO for WordPress covers how to document DNS changes so nothing is left behind.
Vendor accounts and tag manager access
Every script on your inventory from Step 1 has an account behind it. That account can usually change what the script does, sometimes without any change to your site.
- Who holds the login? Write down a named owner for each vendor. “The agency” or “marketing” is not an owner.
- Is 2FA on? Check in the vendor’s security settings. Don’t assume.
- Are passwords shared? Shared logins make it impossible to remove one person’s access. Move to individual user seats where the vendor offers them.
- Ex-staff and old agencies. Remove anyone who no longer works on the site. Agencies often keep access for years after a contract ends.
- Cancelled tools. If you stopped paying for a tool but its script still loads, you have code running from an account nobody watches. Remove the script first, then close the account.
Search Console, GA4 and WordPress users
These three hold your search visibility, your data and your site. Review them in one sitting.
- Google Tag Manager: Admin > User Management, at both account and container level. Only a small number of people should have Publish permission, because publishing is how new code reaches your live site.
- GA4: Admin > Access management at account and property level. Reduce Administrator and Editor roles to people who actually need them. Unexpected access changes can also explain odd tracking problems, like those in my GA4 unassigned traffic audit.
- Search Console: Settings > Users and permissions. Google’s guidance on hacked and social engineering issues tells you to check that no new suspicious owners have been added (Google Search Central). Remove unknown users and their verification tokens, not just the user entry.
- WordPress administrators: Users > All Users, filtered by Administrator. Question every admin account you don’t recognise.
- Application passwords: Users > Profile > Application Passwords for each admin. These allow API access without the normal login, so revoke any you can’t explain.
- Recently installed plugins: Check Plugins > Installed Plugins for anything new, renamed or unexpected, especially plugins that add header or footer code.
If you have WP-CLI access, these commands speed up the review:
wp user list --role=administrator --fields=ID,user_login,user_email,user_registered
wp user application-password list <user-id>
wp plugin list --fields=name,status,version
| Check | Where | Status | Notes / owner |
|---|---|---|---|
| Registrar 2FA on | Registrar security settings | Not checked / Done / Needs action | |
| Registrar transfer lock on | Registrar domain settings | Not checked / Done / Needs action | |
| DNSSEC enabled (if supported) | Registrar / DNS host | Not checked / Done / N/A | |
| Registrar contact emails current | Registrar account profile | Not checked / Done / Needs action | |
| No CNAMEs to unused vendors | DNS zone export | Not checked / Done / Needs action | |
| Named owner and 2FA for each vendor | Script inventory + vendor dashboards | Not checked / Done / Needs action | |
| Ex-staff and agency access removed | All vendor tools | Not checked / Done / Needs action | |
| GTM publish rights limited | GTM Admin > User Management | Not checked / Done / Needs action | |
| GA4 roles reviewed | GA4 Admin > Access management | Not checked / Done / Needs action | |
| No unknown Search Console owners | Settings > Users and permissions | Not checked / Done / Needs action | |
| WordPress admins reviewed | Users > All Users | Not checked / Done / Needs action | |
| Application passwords reviewed | Users > Profile | Not checked / Done / Needs action | |
| Recent plugins reviewed | Plugins > Installed Plugins | Not checked / Done / Needs action |
Step 4: Add Subresource Integrity and CSP where they actually help
Subresource Integrity (SRI) and Content Security Policy (CSP) are the two browser controls most often recommended after an incident like this. Both are useful. Neither one, on its own, would have stopped the DebugBear attack, and it helps to understand why before you spend time on them.
“We have a Content Security Policy, so a compromised vendor script can’t hurt us.”
Not quite. A CSP controls where scripts may load from. It does not check what the script contains. If the allowed domain starts serving bad code, the browser still runs it.
How SRI works and when you can use it
With SRI, you add a cryptographic hash of the file to the <script> tag. The browser downloads the file, calculates its hash and refuses to run it if the hashes don’t match. For cross-origin files, the tag also needs crossorigin="anonymous" so the browser can check the response (MDN).
If an attacker swapped a pinned file through a DNS hijack, SRI would block it, because the new file would have a different hash.
<script
  src="https://cdn.example-cdn.com/library/3.7.1/library.min.js"
  integrity="sha384-REPLACE_WITH_THE_REAL_HASH"
  crossorigin="anonymous"></script>
Generate the hash from the exact file you have reviewed:
curl -s https://cdn.example-cdn.com/library/3.7.1/library.min.js -o library.min.js
openssl dgst -sha384 -binary library.min.js | openssl base64 -A
In WordPress, enqueue the file normally and add the attributes with a filter. The script_loader_tag filter works on enqueued scripts and receives the script handle, so you can target one file only:
add_action( 'wp_enqueue_scripts', function () {
    wp_enqueue_script(
        'pinned-library',
        'https://cdn.example-cdn.com/library/3.7.1/library.min.js',
        array(),
        null, // no ?ver= query string, so the URL matches the hashed file
        array( 'strategy' => 'defer', 'in_footer' => true ) // WP 6.3+
    );
} );

add_filter( 'script_loader_tag', function ( $tag, $handle, $src ) {
    if ( 'pinned-library' !== $handle ) {
        return $tag;
    }
    $integrity = 'sha384-REPLACE_WITH_THE_REAL_HASH';
    return str_replace(
        ' src=',
        ' integrity="' . esc_attr( $integrity ) . '" crossorigin="anonymous" src=',
        $tag
    );
}, 10, 3 );
WordPress also has a wp_script_attributes filter, which changes the attributes array for tags printed with wp_print_script_tag() and wp_get_script_tag(). Which output path a given script uses depends on how it is added and on your WordPress version. Check the current filter documentation on developer.wordpress.org and test the rendered HTML with View Source before relying on either method.
Why SRI won’t work for most marketing tags
SRI only works when the file never changes. Scripts that the vendor updates on its own server, such as analytics tags, payment SDKs and CAPTCHAs, can’t use SRI, because every vendor update would break the hash and the script would stop running (squirrelscan).
A RUM or monitoring script usually falls into the same group. So for most of the scripts on a typical marketing site, you have two realistic options:
- Self-host a pinned version, but only where the vendor’s licence and update model allow it. Google lists self-hosting and SRI among the safety measures for third-party JavaScript (Google for Developers). The trade-off is that you now own updates, including security fixes.
- Accept the risk and monitor it. Keep the script only if it earns its place, limit where it loads (for example, not on checkout or account pages), and re-check it regularly.
Never self-host payment or CAPTCHA scripts unless the provider explicitly supports it. Breaking those can break checkout or compliance.
Integrity-Policy: an option to watch
MDN documents the Integrity-Policy and Integrity-Policy-Report-Only response headers, which can require integrity metadata on scripts (MDN). The report-only version tells you which scripts lack an integrity attribute without blocking anything.
This is newer than SRI itself. Check the browser compatibility table on MDN before you rely on it, and start in report-only mode.
CSP basics for WordPress: start in report-only
A CSP tells the browser which domains may supply scripts, frames, images and connections. On WordPress, an enforced policy written from guesswork will almost certainly break something, because themes, plugins and WordPress itself output inline scripts.
Use this order:
- List every script domain from your Step 1 inventory that you have decided to keep.
- Send
Content-Security-Policy-Report-Onlyon the front end. It reports violations but blocks nothing. - Collect reports for at least a couple of weeks, covering normal pages, checkout, account pages and any campaign landing pages.
- Fix or allow each legitimate violation, and investigate anything you don’t recognise.
- Switch to
Content-Security-Policyonce reports are quiet, and keep reporting turned on.
Content-Security-Policy-Report-Only:
  default-src 'self';
  script-src 'self' https://www.googletagmanager.com https://cdn.example-cdn.com;
  connect-src 'self' https://*.google-analytics.com https://*.analytics.google.com;
  img-src 'self' data: https:;
  frame-src https://www.youtube-nocookie.com;
  object-src 'none';
  base-uri 'self';
  report-uri https://example.com/csp-reports;
Treat this as a starting shape, not a copy-paste policy. Your report endpoint, domains and directives depend on your stack. report-uri is widely supported, while the newer report-to uses a separate reporting header, so check current support before choosing.
Google Tag Manager needs extra allowances. Custom HTML tags and many GTM templates inject inline code and load further domains. Without a nonce-based setup or 'unsafe-inline', those tags fail. Check Google’s Tag Platform CSP guidance for the current requirements, and remember that every domain a GTM tag loads must also be allowed.
Apply the policy to the front end first. The WordPress admin uses a lot of inline script, and a strict admin policy is a separate project.
What CSP can and cannot stop
CSP is good at stopping scripts from new domains, such as code injected by a hacked plugin that loads from an attacker’s server. It also reduces where stolen data can be sent if you restrict connect-src.
But a CSP allowlist does not stop a DNS hijack of a domain you already allow. In the DebugBear case, the bad file came from the same, already-trusted domain (Relevant Audience). Reflectiz notes that the script address on the site never changed (Reflectiz).
So CSP narrows your exposure. It doesn’t verify the code. SRI verifies the code, but only for files that never change. The real protection is having fewer scripts, on fewer pages, with accounts you control.
| Script type | Can use SRI? | CSP approach | Fallback control |
|---|---|---|---|
| Versioned library from a public CDN | Yes | Allow the CDN host in script-src |
Self-host the same version and drop the CDN |
| Self-hosted script on your domain | Possible, rarely needed | Covered by 'self' |
File integrity monitoring, plugin updates |
| GTM container | No (updates on publish) | Allow GTM host; nonce for custom HTML tags | Limit Publish rights, review version history |
| Analytics tags (e.g. GA4) | No | Allow script and connect-src hosts |
Access reviews, monitor for unexpected changes |
| Payment SDKs | No | Allow exactly what the provider documents | Load only on checkout, follow provider’s security guidance |
| CAPTCHAs | No | Allow script and frame hosts | Load only on forms that need it |
| RUM / monitoring scripts | Usually no | Allow vendor host | Sample pages, exclude login/account/checkout, regular re-audit |
| Chat, review and social widgets | Usually no | Allow script, frame and connect hosts | Load on interaction, remove if low value |
| Video and map embeds (iframes) | Not applicable | Use frame-src |
Click-to-load facade |
If you would like a second pair of eyes on your policy before you enforce it, you can book a free consultation and we can go through your report-only data together.
Step 5: Remove unused tags and load the rest efficiently
Every script you remove cuts your attack surface and your main-thread work at the same time. A script that isn’t on the page cannot be hijacked and cannot slow anything down.
So remove what you don’t need first. Then make the scripts that remain load as late and as lightly as possible.
Removal decision rules
Go through your inventory and mark a script for removal if any of these is true:
- No owner. Nobody in the business can say who added it or who uses it.
- Vendor contract ended. You cancelled the tool, but the tag is still loading.
- Data not used in 90 days. Nobody has opened the dashboard, report or recordings in the last three months.
- Duplicate tool. Two heatmap or session-recording tools, two chat widgets, or GA4 loaded twice (once by a plugin and once through Google Tag Manager).
- Old campaign pixel. A pixel for an ad account or affiliate programme you no longer run.
Duplicate GA4 tags also distort your reports. They can double-count page views and events. If your GA4 data looks inflated or messy, check this alongside the other causes in GA4 unassigned traffic: find and fix the causes.
If a script fails none of these rules, keep it. Write down its owner and the reason it stays.
Defer, async, delay and facades
For the scripts you keep, use defer by default. Deferred scripts download in parallel and run in order after the HTML is parsed, so they don’t block rendering.
Use async only for independent scripts that don’t rely on anything else, such as some analytics tags. Async scripts run as soon as they arrive, in no fixed order.
Since WordPress 6.3, wp_enqueue_script() accepts a strategy argument. You can also load a script only on the pages that need it:
add_action( 'wp_enqueue_scripts', function () {
    // Only load the booking widget on the booking page.
    if ( ! is_page( 'book-now' ) ) {
        return;
    }

    wp_enqueue_script(
        'vendor-booking',
        'https://widget.example-vendor.com/booking.js',
        array(),
        null,
        array(
            'strategy'  => 'defer',
            'in_footer' => true,
        )
    );
} );
There is one detail to know here. WordPress can fall back to normal blocking loading if a script that depends on this one is itself blocking. If you don’t see defer in View Source, check the dependency chain. Confirm the current behaviour in the wp_enqueue_script reference.
Other techniques that help:
- Delay until interaction. Some optimisation plugins can hold a script back until the user scrolls, clicks or types. This works well for chat and heatmaps. Don’t delay consent banners, payment SDKs or anything checkout depends on.
- Facades for chat and video. Show a static image or button that looks like the widget. Load the real chat or YouTube player only when someone clicks it.
- Conditional loading in GTM. Use page-path triggers so a tag fires only on the URLs where it is needed, not on “All Pages”.
Clean removal: every layer, then cache
Scripts often get injected in more than one place. Work through every layer in this order:
- Plugin setting. Turn off the integration inside the plugin before you deactivate it.
- Google Tag Manager. Pause the tag and publish. When you have confirmed nothing broke, delete it and publish again.
- Header/footer injector snippets. Check any “insert headers and footers” style plugin, your theme options and the Customizer.
- Theme files. Search
header.php,footer.phpandfunctions.phpin the active theme and the child theme. - Database. Search for the vendor domain in options, widgets and post content.
- CDN and edge rules. Remove any script injection, worker or HTML rewrite rule at the CDN.
wp db search "vendor-domain.com" --all-tablesThen purge everything: the page cache plugin, the CDN cache, and any static HTML exports or pre-rendered pages.
“I deleted the plugin, so the script is gone.”
Often it isn’t. Many tools ask you to paste a snippet into GTM or the theme as well as installing a plugin. Deleting the plugin leaves the hard-coded snippet or GTM tag still loading.
To confirm removal:
- Open the page in an incognito window, so logged-in exclusions and extensions don’t hide anything.
- Use View Source and search for the vendor domain.
- Open DevTools > Network, filter by the vendor domain and reload. GTM-injected scripts only show up here, not in View Source.
- Repeat on a cached page such as the home page or a busy product page, not just a page you just edited.
Step 6: Measure the speed impact before and after
Removing scripts should make pages faster. You still need proof, because tool changes can make a page look faster when nothing has changed. Measure in the lab first, then confirm with field data.
Lab testing with Lighthouse and DevTools request blocking
Lighthouse has a third-party audit, “Reduce the impact of third-party code”. It fails when third-party code blocks the main thread for more than 250 ms. Lighthouse treats any script from a different domain as third-party (Chrome for Developers).
Recent Lighthouse versions have renamed and regrouped some audits as “insights”. Check the current audit or insight name in the version you are running before you write it into a report or a ticket.
You can estimate what a script costs before you remove it. Use DevTools request blocking (web.dev):
- Open DevTools > Network and reload the page.
- Right-click the vendor request and choose Block request domain (or Block request URL).
- Run Lighthouse from the DevTools Lighthouse panel with blocking still active.
- Compare against a run without blocking.
This also shows you if anything breaks without the script, such as a form, the cart or checkout.
Keep your tests consistent:
- Use the same Lighthouse version, device mode and throttling for every before and after run.
- Run each test 3–5 times and record the median. Single runs vary too much to trust.
- Track LCP and Total Blocking Time in the lab. A standard page-load Lighthouse run does not measure INP. Use Lighthouse timespan mode or the DevTools Performance panel to test real interactions, and rely on field data for INP itself.
Field data: CrUX, Search Console Core Web Vitals
Lab tests show cause and effect. Field data shows what real visitors experience, and it is the data Google uses for Core Web Vitals.
CrUX data is a rolling 28-day window, and the Search Console Core Web Vitals report is built on it. Allow about 28 days after the change before you judge the result. After you fix an issue group, you can use Validate fix in the report to start tracking it.
INP is where third-party script cleanup usually shows most clearly in field data. Chat widgets, heatmaps and tag-heavy pages often add work on every click.
Avoid false wins from the Lighthouse update
A recent Lighthouse update changed how it simulates page loads. It may raise PageSpeed Insights lab scores on pages that have not changed at all (Search Engine Journal).
If your “before” test ran on the old version and your “after” test ran on the new one, the improvement may not come from the script removal. Record the Lighthouse version in every log entry. PSI and DevTools both show it at the bottom of the report. For more on why scores move, see PageSpeed Insights score changed? Lab vs field data explained.
Use a simple speed log like this:
| Script | Blocking time before | Blocking time after | LCP / INP change | Lighthouse version | Date |
|---|---|---|---|---|---|
| Vendor and handle (e.g. chat widget) | Median ms, 5 runs | Median ms, 5 runs | Lab LCP; field INP after 28 days | From report footer | Change date |
| Duplicate GA4 (plugin) | |||||
| Old heatmap tool |
Log one script per row and make one change at a time where possible, so each result maps to one decision. If you want a second opinion on what is slowing your site, start with the free SEO check.
Incident checklist: when a script vendor is compromised
When a vendor tells you their script has been compromised, speed matters more than a perfect diagnosis. Every page view that loads the bad file is another chance for it to run in your visitors’ browsers.
DebugBear’s advice to customers was to remove the RUM embed. Search Engine Journal’s guidance for site owners goes further: remove the embed, check templates, plugins and tag managers, clear cached pages, confirm the script no longer loads, look for suspicious activity, revoke unauthorised access and reverse malicious changes (Search Engine Journal). The checklist below turns that into an order of work for a WordPress site.
“The vendor says only one customer was targeted, so we’re fine.”
DebugBear’s early findings say a single customer was targeted (SecurityWeek). SEJ also notes it was not yet clear whether other customers received malicious code. Early findings are not a clean bill of health. Act first and relax later.
First hour: contain
- Remove or pause the tag in every injection layer. Use the inventory from Step 1 and the injection map from Step 2. A script is often added in more than one place:
- Theme files (
header.php,footer.php, child themefunctions.php) - “Header and footer” or code snippet plugins
- The vendor’s own WordPress plugin
- Google Tag Manager (pause or delete the tag, then publish the container)
- Edge or hosting injection, such as CDN workers or a tag manager run from your CDN
- Theme files (
- Purge every cache. Clear your page cache plugin, your host’s server cache and your CDN. If you only clear one, visitors may keep getting old HTML with the script in it.
- Confirm it’s gone. Open the page in a private window. In DevTools, go to the Network tab and filter by the vendor’s domain. Then check the raw HTML from the command line.
# Check the raw HTML of key templates for the vendor domain
curl -s https://example.com/ | grep -i "vendor-domain.com"
curl -s https://example.com/product/sample-product/ | grep -i "vendor-domain.com"
curl -s https://example.com/checkout/ | grep -i "vendor-domain.com"

# No output = the string is not in that HTML response.
# Repeat while logged in (in the browser) for account and checkout pages.
Note that curl sees what a logged-out visitor sees. The DebugBear script targeted logged-in traders (SecurityWeek), so test logged-in pages in the browser as well.
Same day: investigate and check
Once the script is gone, work out whether anything else changed while it was live.
- WordPress users. Go to Users > All Users and sort by role. Look for administrators or shop managers you don’t recognise, and check recent registration dates.
- Plugin and theme files. Compare files against clean copies. Many security plugins can check core and plugin files against wordpress.org checksums. Look for recently modified files in
wp-content. - GTM version history. In Tag Manager, open Versions and check who published what, and when. Then check Admin > User Management for users you didn’t add.
- Search Console owners. Go to Settings > Users and permissions. Google advises checking that no new suspicious owners have been added (Google Search Central).
- Payment and checkout behaviour. Place a test order. Check that payment fields, redirects and the order confirmation behave normally, and that there are no extra fields or pop-ups.
Then revoke any unauthorised access and roll back malicious changes. Restore modified files from a known-clean source, not from a backup taken during the exposure window.
Rotate credentials and sessions
Rotate anything the vendor integration or the exposed accounts could reach:
- The vendor account password and its API keys or tokens
- WordPress admin passwords, and application passwords under Users > Profile
- WooCommerce REST API keys (WooCommerce > Settings > Advanced > REST API)
- Payment gateway API keys and webhook secrets, if checkout pages were exposed
- Hosting, SFTP, database and DNS/registrar logins
On WooCommerce and membership sites, think about invalidating all active sessions. Replacing the authentication keys and salts in wp-config.php logs every user out, so any stolen login cookie stops working. Warn customer service first, because customers will need to sign in again.
Search Console Security Issues checks
- Open Security & Manual Actions > Security issues. The report shows a count of detected issues and the affected sample URLs (Search Console Help).
- Open the Manual actions report in the same menu as well.
- Test flagged URLs from a computer outside your own network. Google warns that attackers may hide malicious content from site owners (Google Search Central). Mobile data on a phone that has never logged in to your site is a simple option.
- Fix all issues on all pages, not just the sample URLs. Then select Request Review (Search Console Help).
- In the request, explain the clean-up for each issue category: what you found, what you removed and what you changed to stop it happening again (Search Console Help).
- Watch Messages in Search Console for the result.
If the site isn’t verified in Search Console, Google’s help page points you to the Safe Browsing transparency report to check the site’s status (Search Console Help). Verify the property anyway. You can’t request a review without it.
Afterwards: recover and document
Check your data-protection duties. If personal data, logins or payment details may have been exposed, you may have to notify a regulator or affected people. The rules depend on where you and your customers are:
- UK: UK GDPR, with guidance from the ICO
- Australia: the Notifiable Data Breaches (NDB) scheme, overseen by the OAIC
- USA: state breach notification laws, which differ by state
- Bangladesh: check the current data protection and cyber security rules that apply to your business
Some of these schemes have strict time limits. Check the current deadlines with the regulator’s own guidance or a lawyer, and record the time you first became aware of the incident.
Customers who were affected may search your brand name with words like “hack” or “scam”. A brand SERP audit helps you see what Google and AI tools are now showing about you.
Print this table and fill it in while you work.
| Step | Owner | Done | Notes |
|---|---|---|---|
| Remove/pause tag in theme, plugins, snippets, GTM, edge | ☐ | List every location found | |
| Publish GTM container after removal | ☐ | Version number: | |
| Purge plugin, server and CDN caches | ☐ | Time purged: | |
| Confirm script absent (logged out and logged in) | ☐ | Templates tested: | |
| Audit WordPress users and roles | ☐ | ||
| Check plugin/theme file changes | ☐ | ||
| Review GTM versions and users | ☐ | ||
| Check Search Console owners and users | ☐ | ||
| Test checkout and payment flow | ☐ | ||
| Rotate passwords, API keys, webhook secrets | ☐ | Which keys: | |
| Reset salts / invalidate sessions (if needed) | ☐ | ||
| Check Security issues and Manual actions | ☐ | ||
| Request Review (if issues listed) | ☐ | Date sent: | |
| Check breach notification duties | ☐ | Jurisdictions: | |
| Write incident summary and lessons | ☐ |
Finish with a short written summary: timeline, what loaded, where it was injected, what you changed and who signed off. That document is what makes the next incident faster.
Common mistakes and troubleshooting
Most problems after a script audit come from one of three things: a script that won’t go away, tracking that breaks, or a warning that won’t clear. Here is how to work through each.
The script still loads after removal
If DevTools still shows the vendor’s request, check these causes in order:
| Cause | How to check | Fix |
|---|---|---|
| Cached HTML copy | View source and look for the cache plugin’s footer comment or timestamp; check response headers for CDN cache hits | Purge page cache, server cache and CDN, then retest |
| GTM change not published | In GTM, the Workspace shows unpublished changes | Submit and publish a new container version |
| Second injection point | Search the theme, snippet plugins and database for the vendor domain | Remove every copy, not just the first one found |
| Browser extension confusion | Test in a clean profile or private window with extensions off | Ignore requests that only appear with the extension on |
| Edge injection | Script appears in curl output but not in WordPress files or database |
Check CDN workers, edge tag tools and host-level injection settings |
To search the database for leftover copies, WP-CLI is the quickest option:
# Search all tables for the vendor domain (read-only)
wp db search "vendor-domain.com" --all-tables

# Common places it shows up:
# wp_options (header/footer plugin settings, widget content)
# wp_postmeta (page-builder data)
# wp_posts (custom HTML blocks)
Tracking breaks after adding CSP or SRI
A new Content Security Policy often blocks Google Tag Manager or GA4 on the first try. That is why you start in report-only mode.
- Send the policy as
Content-Security-Policy-Report-Onlyfirst. - Browse key templates and read the violations in the DevTools Console, or in your reporting endpoint.
- Add only the domains the violations show are needed for each directive.
- Switch to the enforcing header once the reports are clean.
Content-Security-Policy-Report-Only:
  script-src 'self' https://www.googletagmanager.com;
  connect-src 'self' https://*.google-analytics.com https://*.analytics.google.com https://www.googletagmanager.com;
  img-src 'self' https://*.google-analytics.com https://www.googletagmanager.com;
Treat this as a starting point, not a final policy. Regional GA4 endpoints and the tags inside your container add more domains. Your own violation reports are the source of truth.
“GTM keeps breaking, so we’ll just add ‘unsafe-inline’ to script-src.”
Adding 'unsafe-inline' site-wide allows any injected inline script to run, which removes much of the reason for having a CSP. Use a nonce for the GTM snippet instead, and keep the strict policy everywhere else.
If conversions drop after a CSP change, check GA4 for a jump in unassigned traffic too. Blocked tags can break session attribution. See GA4 Unassigned Traffic: Find and Fix the Causes.
SRI hash mismatch after a vendor update
If the console shows an integrity error and the script stops working, the vendor has probably changed the file. For unversioned URLs this is expected. SRI doesn’t work for scripts that update themselves on the vendor’s server, such as analytics, payment SDKs and CAPTCHAs (squirrelscan).
You have two choices:
- Pin the version. Use a versioned URL (for example
/lib@2.4.1/lib.min.js) and update the hash when you upgrade on purpose. - Drop SRI for that file. Rely on vendor review, a tight CSP and monitoring instead.
Also check that cross-origin scripts carry crossorigin="anonymous". Without it, the integrity check can’t work (MDN).
Security warning persists after clean-up
Cleaning the site doesn’t clear the warning by itself. Google needs a review request before it updates the status. Fix all issues, then use Request Review in the Security issues report (Search Console Help).
If the review fails, the malware may still be there but hidden from you. Attackers can serve the bad code only to visitors arriving from search, or only to IPs that aren’t yours. Google advises testing flagged URLs from a computer outside your own network (Google Search Central).
# Fetch as if arriving from Google search, from a different network
curl -s -A "Mozilla/5.0" -e "https://www.google.com/" https://example.com/flagged-page/ | grep -i "script"
Compare that output with what you see when logged in. Any difference is worth investigating.
Mistake: auditing only the homepage
Many tags load only on certain templates: checkout, cart, my account, thank-you pages or logged-in areas. Payment, fraud-check and conversion scripts often live only there. These are also the pages attackers most want.
Audit at least one page of each template type:
- Homepage and a standard page
- Blog post and category archive
- Product page and shop/category page
- Cart, checkout and order-received page
- My account (logged in) and login page
If you’d like a second pair of eyes on your scripts, checkout tags or a Security issues review, you can book a free consultation.
Keeping it clean: an ongoing third-party script governance routine
A one-off audit only describes your site on the day you ran it. Within a few months, new tags appear, vendors change their code and staff who had access move on.
web.dev recommends re-auditing embeds regularly because vendor code changes over time (web.dev). The routine below keeps the work small enough that it actually happens.
“We audited our scripts last year, so we know what’s on the site.”
You know what was on the site. Marketing plugins, GTM tags added for a campaign and vendor SDK updates all change the picture. Treat the inventory as a living document, not a finished report.
Quarterly audit cadence
Once a quarter is realistic for most small businesses and WooCommerce stores. Busy stores may also want a check before major sales periods, when temporary tracking and promotion tools tend to get added.
Block out half a day and work through these steps:
- Re-run the inventory. Repeat Step 1 on the same set of key pages: home, a category page, a product page, cart, checkout and any lead form. Compare the list of third-party domains with last quarter’s.
- Investigate every new domain. For each one, find where it is injected (theme, plugin or GTM). Then confirm who asked for it and whether it is still needed.
- Review access lists. Check users and roles in WordPress, GTM, your domain registrar, your DNS host, your CDN and Search Console. Remove former staff and agencies. Make sure two-factor authentication is still enabled on registrar and DNS accounts.
- Recheck the speed log. Compare field data from the Core Web Vitals report in Search Console with last quarter’s. If you use lab runs, record the Lighthouse version beside each score. A tool update can change scores on a page you never touched (see PageSpeed Insights score changed? Lab vs field data explained).
- Act on removal dates. Remove any tag whose agreed removal date has passed, unless its owner renews it with a reason.
| Quarterly check | Where | Done when |
|---|---|---|
| Third-party domains | DevTools Network panel, filtered to third-party requests | Every domain matches an inventory row |
| GTM tags | GTM > Tags | Every tag has an owner and is still needed |
| Plugin scripts | Plugins list plus page source | No inactive or unknown plugin is adding scripts |
| Access | WordPress Users, GTM User Management, registrar, DNS, CDN, Search Console | Only current people, with 2FA where available |
| Speed | Search Console Core Web Vitals, same-version lab runs | Changes logged with a likely cause |
If analytics numbers jump after a tag change, check attribution as well. Broken or duplicated tags often show up as odd channel data (see GA4 Unassigned traffic: find and fix the causes).
Change control for new tags
Most script sprawl comes from small “just add this pixel” requests. The fix is a simple rule: nothing goes live without an owner, a purpose, a list of data shared, a consent category, a removal date and an approval.
Keep the request short so people actually fill it in. A shared spreadsheet row or ticket template is enough:
NEW SCRIPT REQUEST
Script / vendor:     [vendor name and script URL]
Owner:               [named person, not "marketing"]
Purpose:             [what decision or feature it supports]
Pages:               [all pages / checkout only / blog only]
Data shared:         [page URL, user ID, email hash, order value...]
Consent category:    [necessary / analytics / marketing]
Injection method:    [GTM / plugin / theme enqueue]
Loading:             [defer / async / on interaction]
Removal date:        [date, or review date if ongoing]
Approved by:         [name, date]
Then lock down Google Tag Manager, because it is the easiest way to add code without touching WordPress:
- Restrict Publish rights to one or two people. Others can have Edit access to prepare changes.
- Use workspaces so separate changes don’t get published together by accident.
- Use the approval workflow where your account offers it. Workspace limits and approval features differ between GTM tiers, so check what your plan includes in Google’s Tag Manager help before you build your process around it.
- Write a version name and notes on every publish. If something goes wrong, you can see what changed and roll back to a previous version.
- Audit Custom HTML tags closely. They can load any script from any domain, so they need the strictest review.
Apply the same rule in WordPress. Only administrators should install plugins. Scripts added through the theme should go through version control or a staging site, not a live file editor.
Monitoring for unexpected script changes
Quarterly audits catch slow drift. Monitoring catches sudden changes, like a vendor file that starts behaving differently overnight. Use a mix of the categories below rather than relying on one.
CSP reporting endpoints. Add a report-to (or older report-uri) directive so browsers send you violation reports. Start with Content-Security-Policy-Report-Only to see what would break before you enforce anything. The Integrity-Policy-Report-Only header can also report scripts loaded without integrity metadata (MDN).
Content-Security-Policy-Report-Only: script-src 'self' https://www.googletagmanager.com; report-to csp-endpoint
Reporting-Endpoints: csp-endpoint="https://example.com/csp-reports"
Remember the DebugBear lesson: CSP reports a script from a new domain, not a malicious file served from a domain you already allow. In a DNS hijack the script URL stays the same, so CSP reporting stays quiet.
Scheduled script-change monitoring. This category of tools, offered by client-side security vendors, fetches the scripts on your pages on a schedule and alerts you when content or behaviour changes. A basic do-it-yourself version is to hash a vendor file daily and compare it with the previous result:
# Daily cron job: alert if a vendor script's content changes
curl -s https://vendor.example.com/widget.js | sha256sum > /tmp/widget.new
diff -q /tmp/widget.new /var/monitor/widget.last || echo "widget.js changed" | mail -s "Script change" you@example.com
mv /tmp/widget.new /var/monitor/widget.last
Expect alerts from scripts that update themselves, such as analytics tags. Each alert still deserves a quick check, especially for scripts that load on checkout or login pages. A server-side fetch may also not see what real visitors get, which is why tests from outside your own network matter.
Uptime and content checks on key pages. Point an uptime monitor at checkout, login and lead form pages. Where your tool supports it, add a keyword or content check, so you hear about broken or altered pages as well as outages.
Search Console. Make sure Security issues and Manual Actions alerts reach someone who reads them. Also check that no unknown owners have appeared in the property settings.
One-page summary: third-party script controls
Use this as the cover page of your governance document. Start with the high-priority, low-effort rows.
| Control | Protects against | Effort | Priority |
|---|---|---|---|
| Script inventory with owners | Unknown and forgotten scripts | Medium (first time), low after | High |
| 2FA and access reviews on registrar, DNS, CDN, GTM and WordPress | Account takeover, DNS hijack of your own domain | Low | High |
| Restricted GTM publish rights and version notes | Unreviewed tags going live | Low | High |
| New-tag request with removal date | Script sprawl, unclear data sharing, consent gaps | Low | High |
| Removing unused tags | Wider attack surface, slower pages | Low to medium | High |
| Defer, async or on-interaction loading | Main-thread blocking, poor Core Web Vitals | Medium | Medium |
| SRI on pinned, versioned files | Changed content in fixed library files | Low per file | Medium |
| Self-hosting stable libraries | Dependence on another party’s domain and DNS | Medium | Medium |
| CSP with reporting | Scripts from unexpected domains | Medium to high | Medium |
| Scheduled script-change monitoring | Changed content on allowed domains, including DNS hijacks | Medium | Medium (high for checkout and login pages) |
| Uptime and content checks on key pages | Broken or altered checkout and forms | Low | Medium |
| Quarterly audit and speed log | Slow drift in security and performance | Medium | High |
If you want a second pair of eyes on your current setup, start with a free SEO check. You can also book a free consultation to plan a governance routine that fits your team.
Frequently Asked Questions
What counts as a third-party script on a WordPress site?
Any script, pixel or iframe served from a domain you don't control is third-party. For security purposes, also include vendor code on your own subdomains via CNAME, vendor files you self-host and scripts loaded by other scripts such as tag managers.
How do I find every third-party script my WordPress site loads?
Open the page in an Incognito window, use the Chrome DevTools Network panel with cache disabled and sort by Domain. Turn on the Initiator column to see which tag loaded which file. Repeat on product, cart, checkout and logged-in account pages, because they often load different scripts.
Can a third-party script steal data from my WooCommerce checkout?
Yes. A script running on your checkout page can read form fields as customers type, including names, addresses and phone numbers. If card details are entered directly on your page, they are exposed too. Limit which scripts load on checkout to the ones that genuinely need to be there.
Does a Content Security Policy protect against compromised vendor scripts?
Only partly. A CSP blocks scripts from domains you haven't allowed, but it trusts every domain on your allowlist. If an allowed vendor domain is hijacked, as in the DebugBear case, the browser still loads the malicious file.
Do third-party scripts hurt SEO?
They can in two ways. Heavy or render-blocking scripts add main-thread work that can damage Core Web Vitals. A compromised script that injects malware or redirects can lead to entries in the Search Console Security issues report and warnings shown to searchers and visitors.
How often should I run a third-party script audit?
Run a full audit at least once or twice a year and a quick check after any major change, such as a new plugin, tag manager edit or marketing campaign. Also review your list whenever a vendor reports a security incident.
Is self-hosting a vendor script safer than loading it from their domain?
It removes the risk of their domain or DNS being hijacked, but you still run their code. You also take responsibility for updates, and some vendors change their files often, which can break self-hosted copies. Decide script by script and keep self-hosted files in your inventory.
Final Thoughts
Start with the inventory. Open DevTools, test your key templates logged out and logged in, and write down every external domain, what loads it and who owns it.
Then apply the decision rule: no owner and no purpose means removal. Pay most attention to checkout and account pages, lock down tag manager and vendor account access with 2FA, and keep a record of what each script costs in speed.
Finally, put a date in your calendar to repeat the audit and keep an eye on the Security issues report in Search Console. If you would like a second pair of eyes on what your site loads, the free SEO check is a good place to start.
Want help applying this to your site? Run the free SEO check or book a free consultation with MD Harunur Rashid. Free SEO check · Book a free consultation